Adding dropshipping products to your Shopify store involves connecting third-party suppliers (like CJdropshipping, Spocket, DSers/AliExpress, Printful) and importing their products into your catalog. This guide walks you through each step – from setting up accounts and integrating apps, to finding and importing products – with actionable tips for pricing, descriptions, and inventory management. We’ll cover four major sourcing platforms (CJdropshipping, Spocket, DSers/AliExpress, Printful) and outline common pitfalls to avoid. By the end, you’ll have a clear checklist of best practices for Shopify product sourcing in 2025 and beyond.
CJdropshipping: Setup, Sourcing, and Shopify Integration
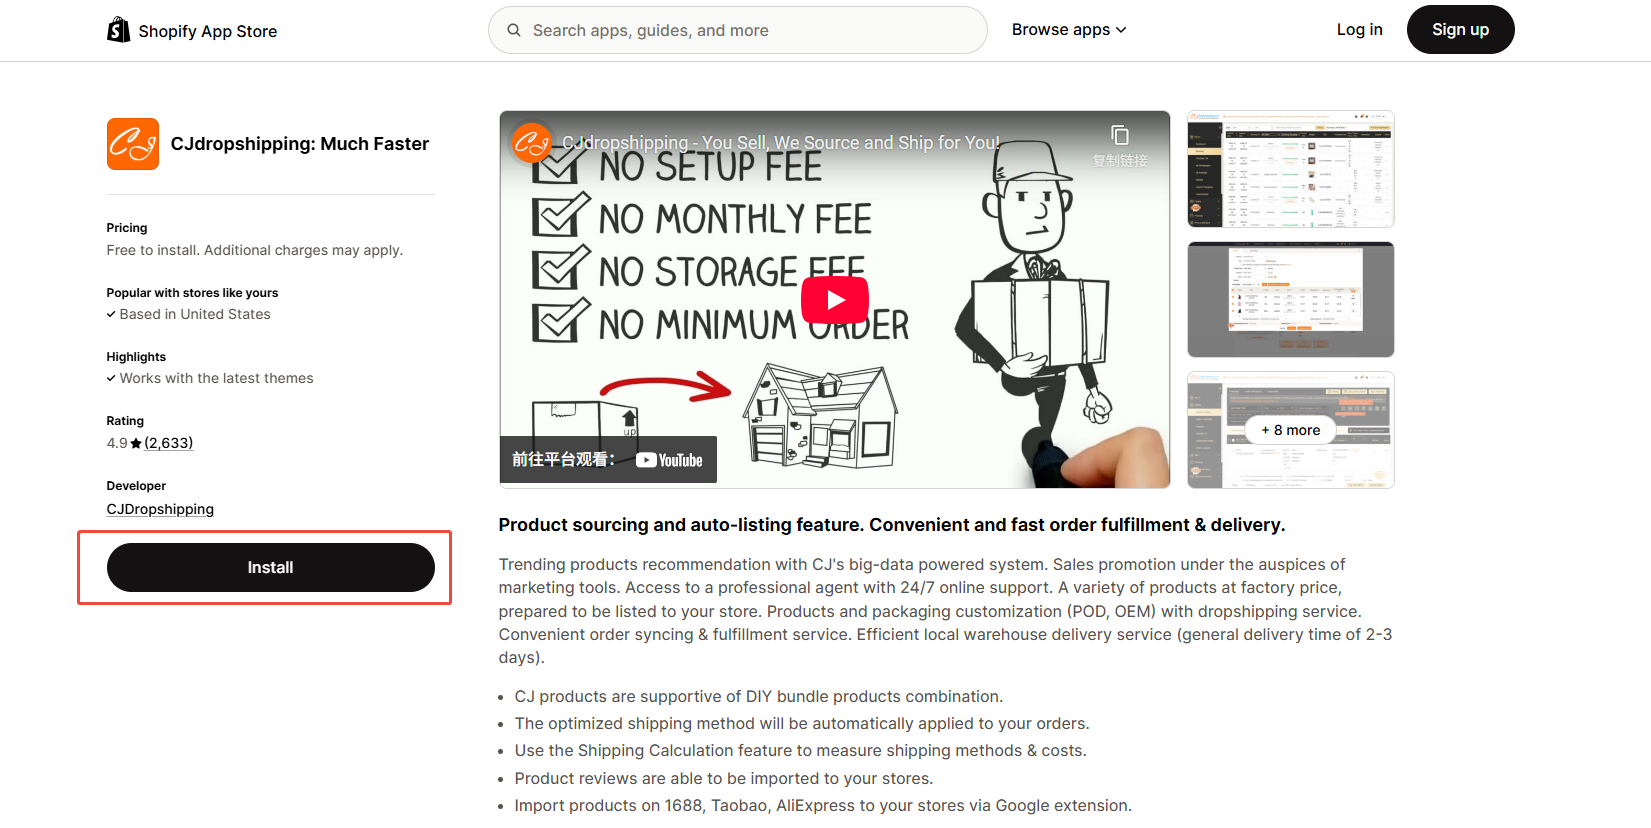
CJdropshipping is a popular China-based dropshipping platform with its own fulfillment network and global warehouses. To get started with CJdropshipping:
1.Create a CJ Account and Connect Your Store:
-
-
Sign up for a free CJdropshipping account. In CJ’s dashboard, go to “Authorization” > “Shopify” and click “Add Stores.” Enter your Shopify .myshopify.com store URL (from your Shopify admin) and follow the prompts to install the CJdropshipping app on Shopify. Alternatively, search for “CJdropshipping” in the Shopify App Store and click Add App.
-
-
-
Once connected, CJ is authorized to sync your Shopify store data. CJ will automatically synchronize orders from Shopify and import tracking numbers back to your store after orders are fulfilled.
-
2.Find Products on CJ:
-
-
In the CJ dashboard, browse products by category, trending lists, or use the search bar to find specific items. CJ also offers features like “Search by Image” (upload an image or screenshot to find similar products).
-
Consider filtering for CJ’s US or EU warehouse products for faster delivery (CJ has warehouses worldwide). Items in local warehouses can ship in as little as 2–7 days to customers.
-
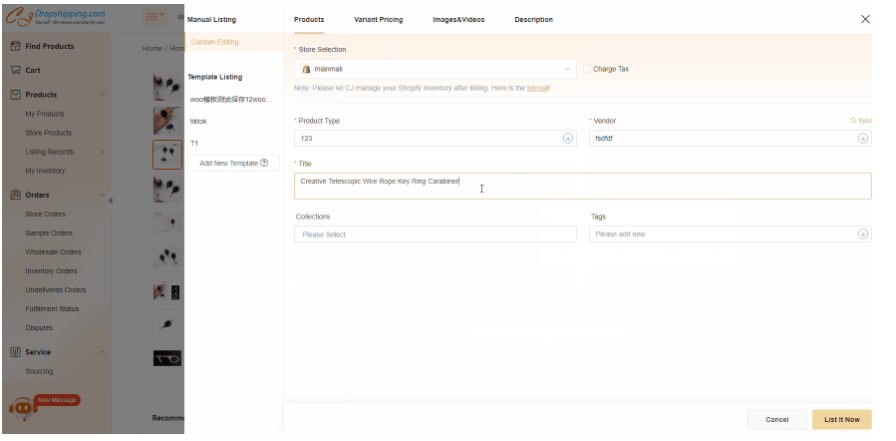
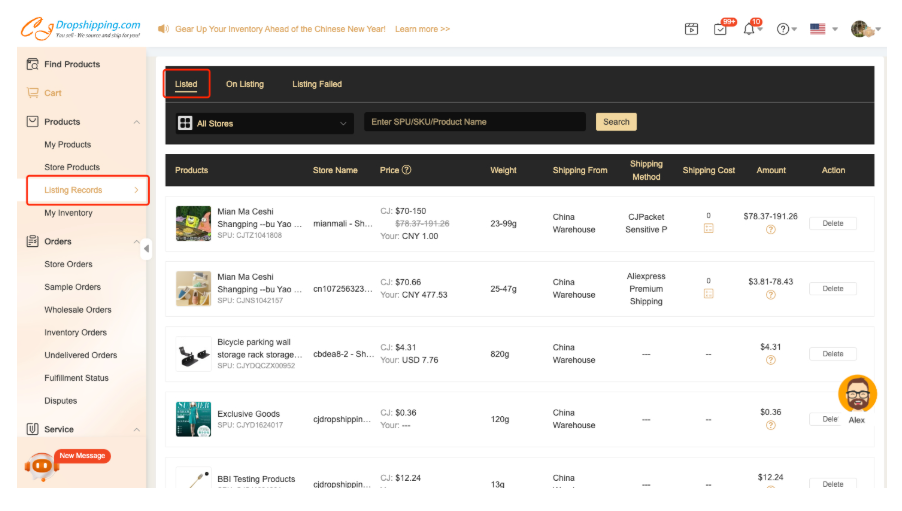
3.Import (List) Products to Shopify:
-
-
When you find a product, click the “List” button on CJ’s site to import it into your Shopify store. You can choose “List It Now” (to import immediately) or “Add to My Products” to hold for later.
-
In the listing dialog, fill in details: set a Vendor name (we recommend using your store name), choose a Shipping Method and destination country to estimate shipping costs, and tick “Charge Tax” if needed. CJ will use your settings when listing.
-
After listing, check “Store Products” or “Listing Records” in CJ to confirm success. You can click “View it in store” to see the live Shopify product. CJ may limit you to 1000 new variants per day (totaling 50,000 variants in the store), so pace your imports accordingly. If listing fails due to limits or image issues, CJ suggests waiting 24 hours or contacting support.
-
4.Edit Titles, Descriptions, Pricing:
-
-
Once imported, edit the product in Shopify or CJ before it goes live. Use clear, SEO-friendly titles and descriptions that highlight the product’s benefits. CJ’s “Edit” function lets you customize title, description, images, variants and set retail price. For example, add bullets for key features, use high-quality images, and include target keywords (e.g. “CJdropshipping Shopify integration”) in the description.
-
Set your pricing to cover CJ’s cost plus profit. You can manually set prices or apply Shopify’s bulk editor if you import many products. Remember to factor in shipping costs and taxes. CJ’s pricing may display in USD or RMB; double-check currency settings.
-

5.Manage Inventory:
-
-
CJ automatically keeps your Shopify inventory in sync with its stock levels. If an item is sold out on CJ, it will show “Sold out” in your store. You can also use CJ to manage inventory: enabling “CJ Manage Inventory” allows CJ to update stock levels for you.
-
Monitor CJ’s “Warehouse” options: sourcing from CJ’s US/EU warehouses (if available) ensures faster shipping (often 2–7 days by USPS+ for US customers) compared to standard China shipping.
-
6.Common Pitfalls and Tips (CJdropshipping):
-
-
Daily Listing Limits: Hitting the 1000-variant per day limit will block new imports. Plan your uploads in batches over days or split large products.
-
Image/Media Failures: Occasionally CJ’s media publishing fails (invalid image URL). If listing fails with an image error, contact CJ support. Always review the imported images in Shopify and adjust if needed.
-
Sync Delays: Ensure CJ has successfully authorized and is syncing. If orders or tracking aren’t appearing in Shopify, retry the store connection or check CJ’s Authorization status.
-
Shipping Times: CJ shipping (even with CJPacket) can take 7–15 days internationally, so highlight this in product pages. For faster delivery, select items in CJ’s US/EU warehouses which can ship in ~2–7 days.
-
Overselling: To avoid selling out-of-stock items, trust CJ’s inventory sync and consider setting Shopify to not allow checkout if stock is zero.
-
Spocket: US/EU Supplier Sourcing and Integration
Spocket is a Shopify app that connects you with suppliers (mainly US/EU) offering faster shipping. Here’s how to use Spocket:
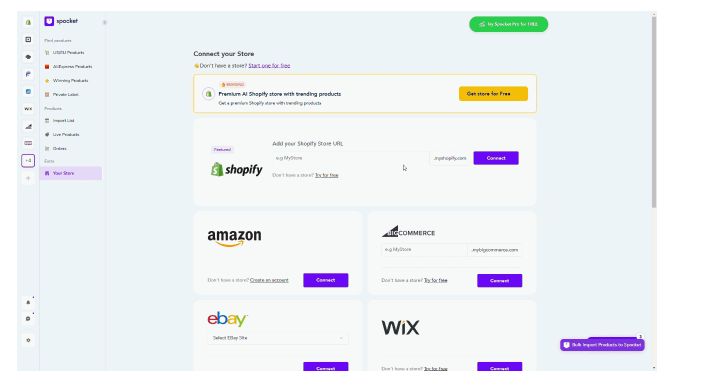
1.Sign Up and Connect Shopify:
-
-
Create an account at Spocket.co (they offer free and paid plans). In your Spocket dashboard, find the “Shopify” integration under Settings or Shop and connect your store by entering your store URL. Alternatively, in Shopify Admin go to Apps > Shopify App Store, search Spocket and add the “Spocket: US & EU Dropshipping” app, then follow the prompt to create/link your Spocket account.
-
2.Browse and Find Products:
-
-
Use Spocket’s platform to browse thousands of products from suppliers in the US, EU, and globally. You can search by category or keyword, or use filters (e.g. price, shipping origin, supplier rating). Because Spocket emphasizes fast shipping, many items can reach customers in 4–7 business days (often 1–3 days for nearby suppliers).
-
Make use of Spocket’s filter by shipping time to find suppliers who offer the fastest delivery in your target market.
-
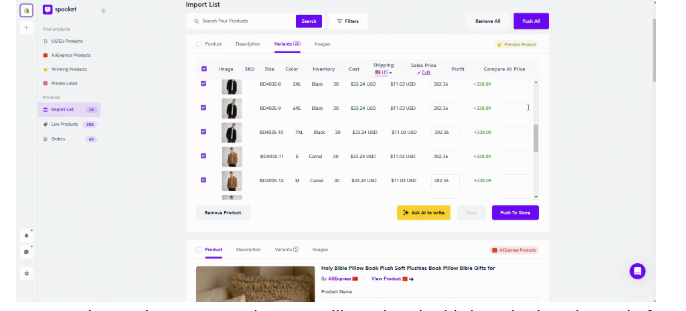
3.Add Products to Import List:
-
-
On a product page in Spocket, click “Add to Import List”. This queues the item for listing. Spocket lets you hold products in an Import List to customize before pushing to Shopify.
-
Go to Import List (left menu) to see all selected items. Here you can edit product titles, descriptions, images, and variants to suit your branding. Spocket’s editor allows modifying the title, description, and retail price.
-
4.Push to Shopify Store:
-
-
In the Import List, after customizing, click “Push to Store” (or “Publish to Store”) on each item you want to sell. Spocket will create a corresponding product in your Shopify admin.
-
If your Spocket plan has limits (the free plan limits product imports), you may need to upgrade or remove items from the list to push more products. Spocket shows your import limit on the page.
-
5.Pricing and Descriptions:
-
-
Set competitive prices in Shopify: Spocket provides the supplier price, and you choose your markup. Research competitor pricing and include any shipping costs in your retail price as needed. Use descriptive, benefit-oriented product descriptions. For example: “Organic Cotton T-Shirt – Soft fabric, premium print quality, ships fast from the US”.
-
Ensure images are high-quality and have consistent styling. You may replace Spocket’s default images with your own branding if needed.
-
6.Inventory Sync:
-
-
Spocket automatically syncs stock levels from the supplier. If a Spocket supplier runs out of stock, the product in your store will show “Sold out.” You don’t need to manually adjust inventory in Shopify as long as the integration stays active.
-
Keep your Spocket app installed and connected. If you ever change your Shopify store domain, reauthorize Spocket to avoid sync interruptions.
-
7.Common Pitfalls and Tips (Spocket):
-
-
Import Limits: Free and basic plans limit the number of products you can import. Plan which bestsellers to push first or consider upgrading the plan if you need many products.
-
Shipping Accuracy: Even though Spocket suppliers ship faster than typical dropshippers, always double-check shipping times and costs on each product page. List estimated delivery times in your Shopify shipping policy.
-
Pricing Rules: Take advantage of Spocket’s pricing formula feature to automatically set retail prices (for example, “double the supplier price”). This ensures consistent margins.
-
Image Licensing: Verify that product images from suppliers have clear licensing. Use Spocket’s images only for promotion. If in doubt, create your own mockups.
-
Integrations: Consider using Spocket alongside other sourcing apps to diversify products and shipping origins.
-
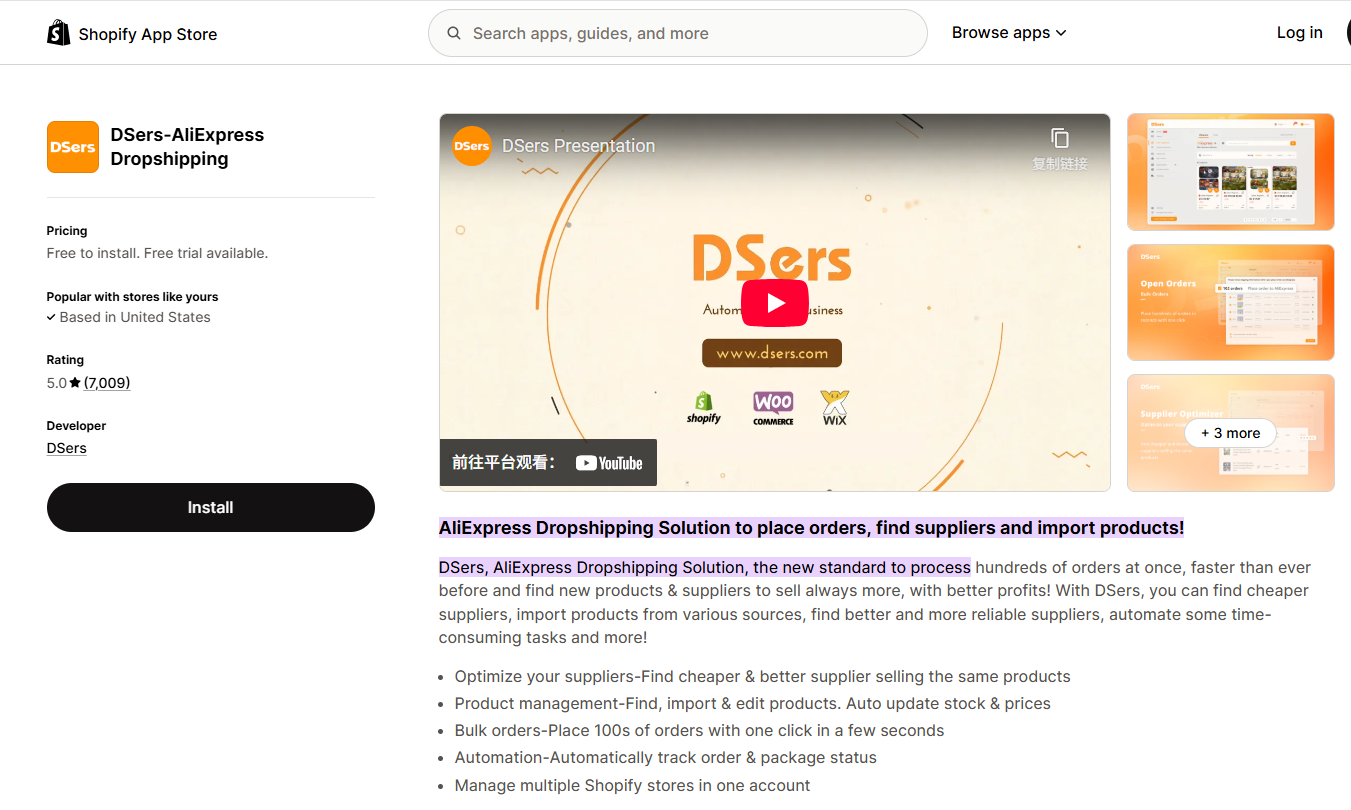
DSers/AliExpress: Setup and Product Importing
DSers is an official Shopify dropshipping app (formerly Oberlo’s successor) that specializes in AliExpress sourcing. To use DSers with Shopify:
1.Install and Connect DSers:
-
-
Create a DSers account on dsers.com. In DSers, go to Settings > Shopify or click “Link your Shopify store”. You can also directly install DSers – AliExpress Dropshipping Tool from the Shopify App Store and log in with DSers. Follow the prompts to authorize DSers to your store.
-
After installing, choose any DSers plan (there is a free plan available) to connect. Now DSers can sync products and orders to Shopify.
-
2.Link AliExpress Account:
-
-
To fully utilize DSers, link your AliExpress account (especially if you want to use coupon codes or check supplier info). In DSers, go to “AliExpress” integration and click the AliExpress button. A popup will ask you to log in to AliExpress and authorize DSers. Once authorized, DSers can import products directly and place bulk orders.
-
3.Find Products on AliExpress:
-
-
Browse AliExpress.com for products you want to sell. Ideally use DSers’ built-in search (“Find Suppliers”) or open AliExpress in Chrome.
-
Method 1 (URL): Copy the AliExpress product URL from your browser. In DSers, go to Import List > Import from AliExpress/Temu and paste the URL into the search box. Click OK and the product will appear in your Import List.
-
Method 2 (Chrome Extension): Install the free DSers Chrome Extension. When on an AliExpress product page, click the “Add to DSers” button in the extension. You can also add multiple products from a listing page by checking them and using the extension’s bulk-import. Each added product lands in your DSers Import List.
-
4.Customize and Push to Shopify:
-
-
In DSers, go to Import List. Here you can Edit Product Details – change titles, descriptions, images, variants, and retail prices. This is your chance to optimize SEO keywords and improve descriptions. You can also tag and split variants if needed.
-
Once ready, select the product and click “Push to Store” (or Publish). DSers will create the product in Shopify. The product will now appear in Shopify’s product list (and in DSers’ My Products list).
-
5.Order Sync and Fulfillment:
-
-
When a customer buys a DSers-sourced product on your store, the order syncs to DSers automatically. With DSers connected to AliExpress, you can place orders in bulk from DSers (or let DSers automate it) and fulfill them. DSers will automatically update tracking numbers from AliExpress back into Shopify.
-
DSers handles currency conversion and can match correct suppliers if you switch between them. Check that the chosen supplier’s stock is sufficient before pushing a product live to avoid overselling.
-
6.Pricing and Inventory:
-
-
DSers allows pricing rules. Set a default markup (e.g. +30%) in DSers Pricing settings, or adjust prices manually in Import List. Always check that your retail price covers product cost plus shipping.
-
Inventory sync is managed via AliExpress data. DSers will mark products as out-of-stock in Shopify if the AliExpress supplier runs out. Ensure DSers is always logged in and synced to avoid delays.
-
7.Common Pitfalls and Tips (DSers/AliExpress):
-
-
Long Shipping Times: AliExpress shipping can take 15–40+ days. Mitigate by choosing ePacket or AliExpress Standard Shipping for tracking. Always display shipping estimates on product pages. Consider targeting customers who are okay waiting, or using DSers to find faster suppliers.
-
Order Volume Limits: DSers enforces order limits (e.g. number of AliExpress orders per day). If you hit a cap, place orders manually on AliExpress or upgrade the plan.
-
Incorrect Mapping: If you delete or duplicate products, mapping to DSers can break. Keep DSers’ “My Products” list tidy. If a product stops syncing, try re-importing it.
-
Currency Mismatch: Make sure your Shopify store currency matches the currency in DSers/AliExpress to avoid conversion errors.
-
Multiple Stores: DSers allows managing multiple Shopify stores. If switching stores, ensure each is properly linked under Settings.
-
Printful (Print-on-Demand): Setup and Adding POD Products
Printful is a print-on-demand (POD) service ideal for custom apparel, accessories, and home goods. It integrates seamlessly with Shopify as an app.
1.Create a Printful Account and Install App:
-
-
Sign up for a free Printful account. In Shopify, go to Apps > Shopify App Store, search for “Printful”, and install the Printful: Print on Demand app (rated 4.8+ stars). Alternatively, from Printful’s site click Sell with Printful > Shopify which sends you to the app store. Printful’s app is available on the Shopify App Store.
-
After installing, log in with your Printful credentials and authorize the connection. You should see your Shopify store connected in the Printful dashboard.
-
2.Connect Accounts:
-
-
Upon first use, Printful will prompt: “Connect your Printful account” and authorize with Shopify. Simply approve and you’ll return to Printful’s dashboard under Stores, showing your new Shopify store. This establishes the integration.
-
In Shopify Settings > Checkout, ensure Printful is set as your fulfillment provider so that orders are automatically sent for printing (Printful fulfills them).
-
3.Create and Add Products:
-
-
In Printful’s dashboard, go to Stores > [Your Store] > Add product. Browse the product catalog (t-shirts, mugs, posters, etc.) and select a product.
-
Use Printful’s Mockup Generator to upload your design, choose colors, styles, and variants. The generator also lets you preview the product.
-
In the same interface, write an engaging product title and description, and set your retail price. Printful shows the base cost; price your item to include your profit margin. For example, if a shirt costs $12, you might list it for $24.
-
Once done, click “Continue” in Printful to sync the product. Printful will push the new product into Shopify with images, variants, and pricing. The item is now live in your Shopify catalog.
-
4.Payment and Shipping:
-
-
Configure your Shopify payments (Shopify Payments, PayPal, etc.) in Settings > Payments. Also, set up Printful billing: in Printful’s Billing section, add a credit card or PayPal to pay for product fulfillment costs.
-
Printful has its own shipping rates which you can import into Shopify or use Printful’s real-time rates. In Shopify Shipping settings, create shipping profiles or zones for Printful products. For example, you might add Printful’s flat-rate for printed shirts to domestic zones.
-
5.Fulfill Orders and Sync:
-
-
When a customer places an order for a Printful product in Shopify, the order will automatically appear in Printful’s Dashboard > Orders. Printful will print, pack, and ship the item under your branding.
-
Printful will then send tracking info back to Shopify, updating the order status for the customer. (Printful updates typically in 2–7 business days after order placement, depending on product and location.)
-
6.Common Pitfalls and Tips (Printful):
-
-
Fulfillment Time: Printful prints orders on demand, which means about 2–7 business days processing plus shipping. Communicate this on product pages. You can offer express options via third-party apps if needed.
-
Higher Per-Unit Cost: POD products cost more per unit than bulk-ordered items. Be sure your retail price reflects this. Some sellers bundle multiple items to increase order value.
-
Branding Options: Use Printful’s White-Label options (custom labels, packaging) to maintain brand consistency.
-
Inventory (Mock Stock): Printful doesn’t require you to manage stock, but if a product goes out of stock (e.g. supplier runs out of a color), Printful will notify you. Then you can hide or delete the product until it’s available again.
-
Returns Handling: Since Printful fulfills, follow Printful’s return policy. Ensure your Shopify policies align with Printful’s terms to avoid customer confusion.
-
Common Pitfalls and Best Practices
Regardless of platform, new dropshippers often face similar challenges. Here are common issues and how to avoid them:
-
Inventory Sync Issues: Always keep your sourcing apps connected and up to date. Inventory levels can change rapidly; double-check that “inventory tracking” is enabled in Shopify for each product. If a supplier stock changes, your app (CJ, Spocket, DSers, Printful) should auto-update Shopify. If something goes out of sync, check that the app is authorized and try re-syncing or re-importing the product.
-
Long Shipping Times: Products from overseas (AliExpress via DSers, or CJ China) can take weeks to arrive. Mitigate this by:
-
Choosing suppliers with local warehouses (e.g., CJ’s US/EU warehouses; Spocket’s US/EU suppliers).
-
Using faster shipping options (ePacket, CJPacket) when adding products.
-
Clearly stating delivery times on product pages and in FAQs. For example, Spocket notes 4–7 day delivery within the US/EU, CJ’s US warehouse items ship in ~2–7 days, and Printful items ship in ~2–7 business days.
-
-
Pricing Mistakes: Failing to cover all costs can wipe out profit. Include the product cost, shipping, taxes, and Shopify fees when setting retail price. Use pricing rules in your app (e.g., set a 2× markup in DSers or Spocket) to automate consistent margins.
-
Poor Product Details: Generic titles and descriptions hurt SEO and conversion. Always edit the imported product name and description. Include keywords (e.g. “how to add dropshipping to Shopify”), highlight features, and write benefits. Use bullet points for easy reading.
-
Overwhelming Product Selection: It’s tempting to list hundreds of products, but too many can be hard to manage. Start with a focused niche or best-sellers. Keep product collections organized. Use tags and categories in Shopify for easy navigation.
-
Neglecting Policies: Dropshipping requires clear store policies. Make sure your Shopify shipping settings match your suppliers’ capabilities (e.g., higher shipping rates for expedited options). Align your returns policy with your suppliers’ (AliExpress vs Printful have different rules).
-
Monitoring Orders: Check that orders flow properly from Shopify to your supplier app. For CJ and DSers, confirm that orders appear in the CJ or DSers dashboard. For Printful, verify new orders show under Printful Orders. If an order doesn’t appear, re-examine the account connection.
-
Communication: Inform customers of processing times. Automated email templates (Shopify or app-based) should mention that products are shipped from supplier locations.
Best Practices Checklist for Shopify Dropshipping
-
Install Trusted Apps: Use official Shopify apps for each supplier: CJdropshipping App, Spocket, DSers – AliExpress, and Printful (found on the Shopify App Store).
-
Connect and Authorize Correctly: Follow each app’s integration steps (Shopify Admin or supplier dashboard) and verify store authorization (look for “Authorization Success” pop-ups in CJ).
-
Test with a Sample: Before going live, add a test product and place a mock order. Ensure the order syncs correctly, the supplier app receives it, and tracking info returns to Shopify.
-
Optimize Titles & Descriptions: Write clear, concise titles and informative descriptions. Include size, color, material, and unique selling points. Use bullet lists for features (e.g., High-quality cotton, Machine-washable, Designed by…).
-
Set Fair Pricing: Calculate price = Product Cost + Shipping + Profit Margin. Use simple markup (e.g. 2×) or dynamic pricing rules (in DSers/Spocket) to automate. Periodically check competitor prices.
-
High-Quality Images: Verify product images are high-resolution. If possible, use lifestyle or multiple-angle photos. Replace or supplement supplier images if they are low-quality.
-
Inventory Management: Enable Shopify inventory tracking. Do not oversell – if a supplier indicates an item is out-of-stock, remove it from sale immediately. Regularly refresh or reconnect supplier feeds to keep stock current.
-
Shipping & Taxes Setup: In Shopify Settings > Shipping, create shipping profiles that match supplier regions and costs. For example, add a flat $5 shipping for domestic CJPacket. In Settings > Taxes, configure tax collection if selling in taxable regions.
-
Order Fulfillment Workflow: Establish a routine: when orders come in, immediately fulfill via your supplier app (place order on AliExpress through DSers, or let Printful auto-fulfill). Mark orders as shipped in Shopify once tracking is received.
-
Monitor Performance: Use Shopify analytics and app dashboards to track bestseller products, profit margins, and conversion rates. Remove or replace slow-moving products regularly.
-
Communicate with Suppliers: Maintain good communication with CJ or AliExpress suppliers if issues arise (e.g., product customizations, quality checks). For Printful, use their chat support for design/production questions.
-
Offer Customer Support: Provide clear contact options for customers. Use Shopify’s order notes or apps to notify customers of tracking numbers. Respond promptly to inquiries about shipping or returns.
-
Stay Informed: Dropshipping trends and apps update frequently. Keep your apps updated (install new versions when available) and follow industry news (e.g. Shopify blog or vendor newsletters) for new features like improved CJ warehouses or DSers capabilities.
By following these steps and double-checking details at each stage, beginners and intermediate users can confidently add dropshipping products to Shopify. Proper setup, careful product curation, and vigilant inventory management ensure a smoother operation and happier customers.