${articleTitle}
How to Create a Sub-account for Your VA?
2049
4 mins article
Date Created: Dec. 29, 2020 19:18:02
Last Edited: Apr. 02, 2026 08:04:52
As your business grows, managing orders and daily tasks alone can become inefficient. Many sellers choose to work with partners or hire virtual assistants (VAs) to improve efficiency.
To support team collaboration, CJ has upgraded the Sub-account Management feature. You can now create sub-accounts and assign different permissions to your team members, allowing them to access your account based on your authorization.
Steps Overview
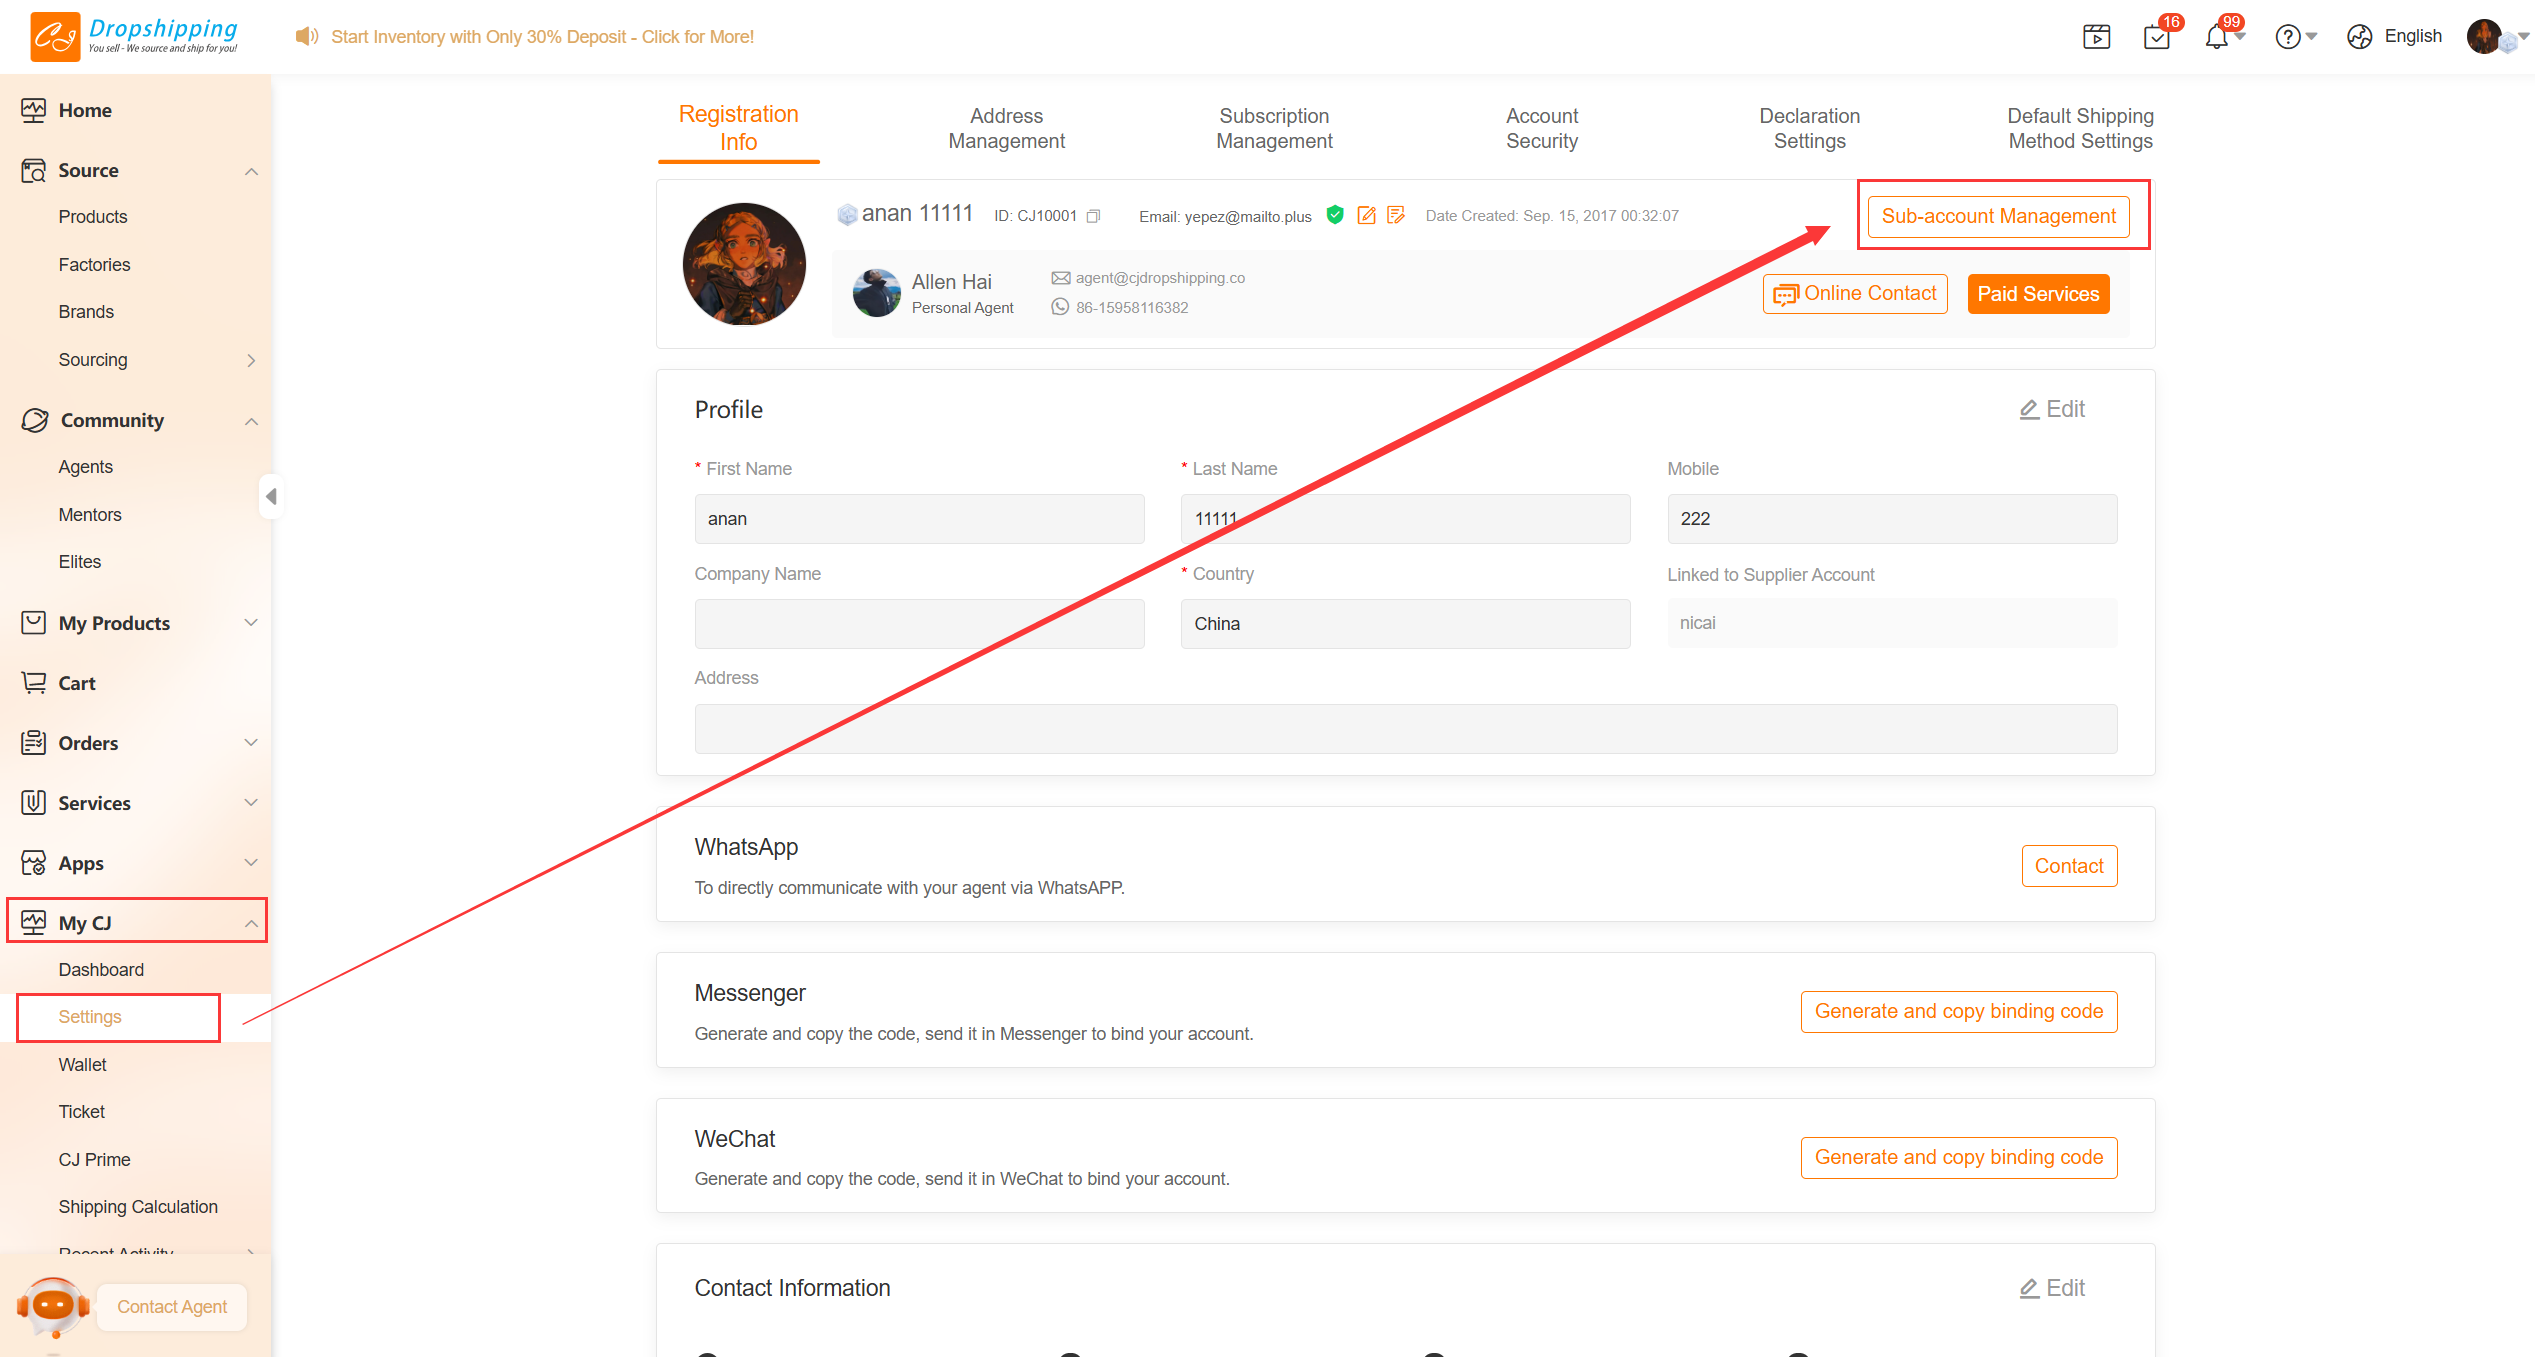
- Go to My CJ > Settings > Sub-account Management
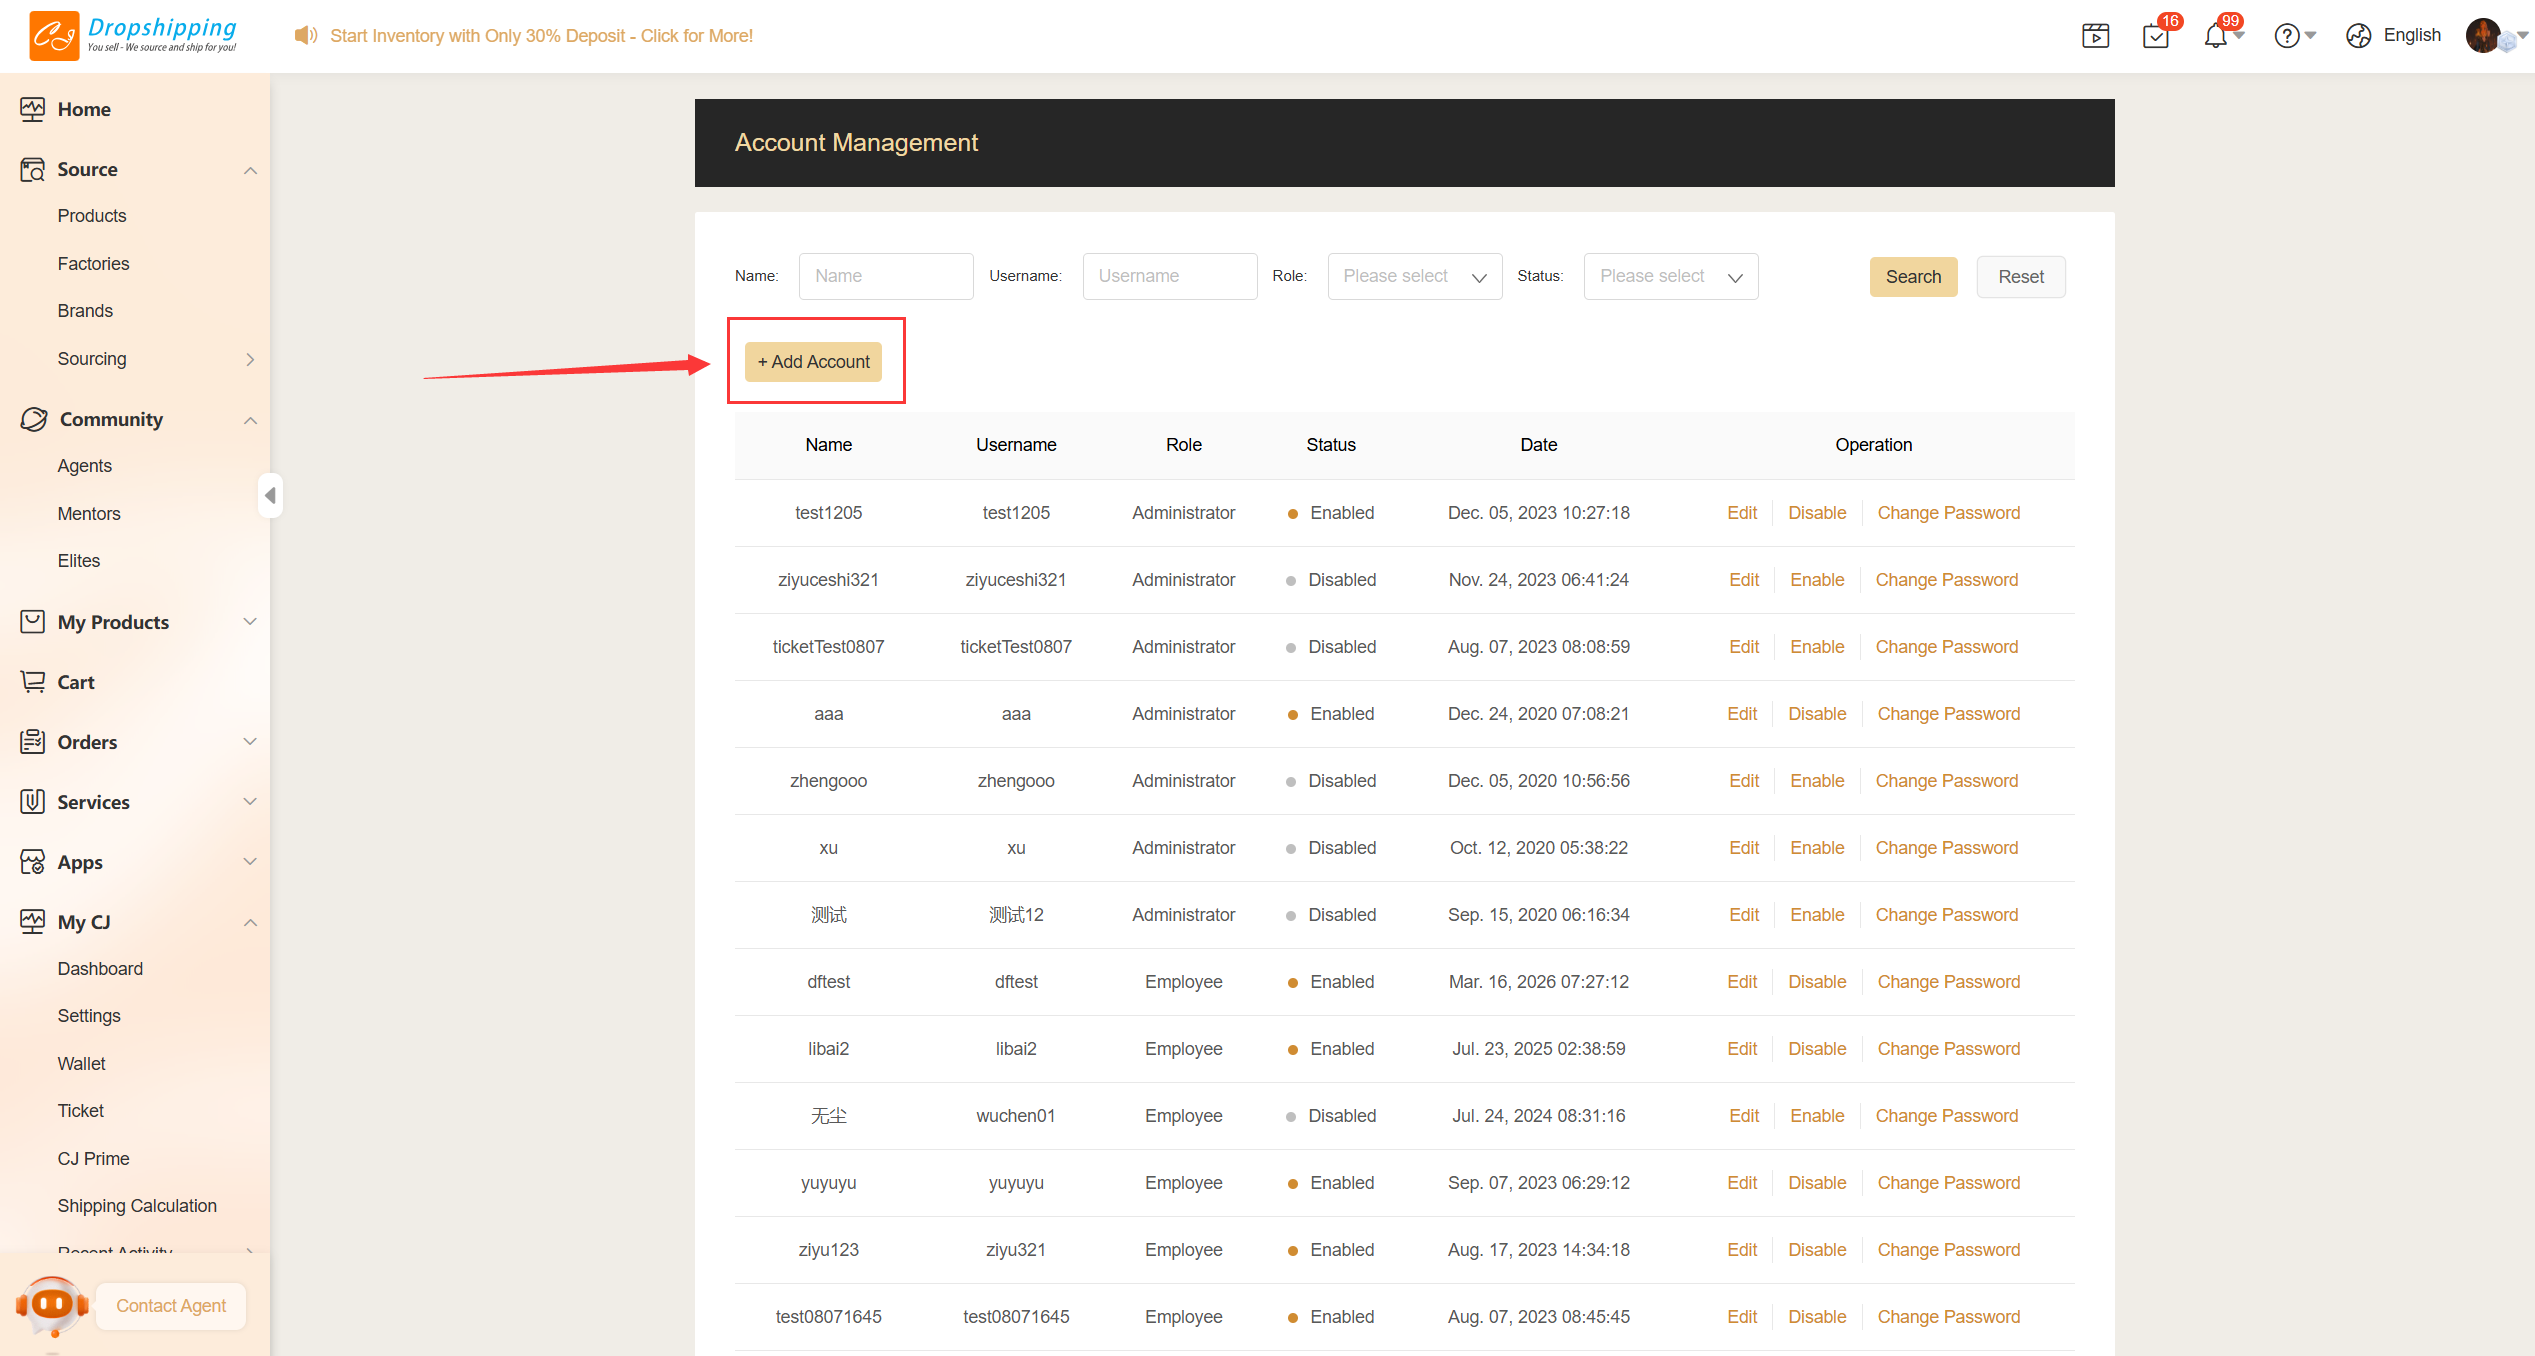
- Click Add Account
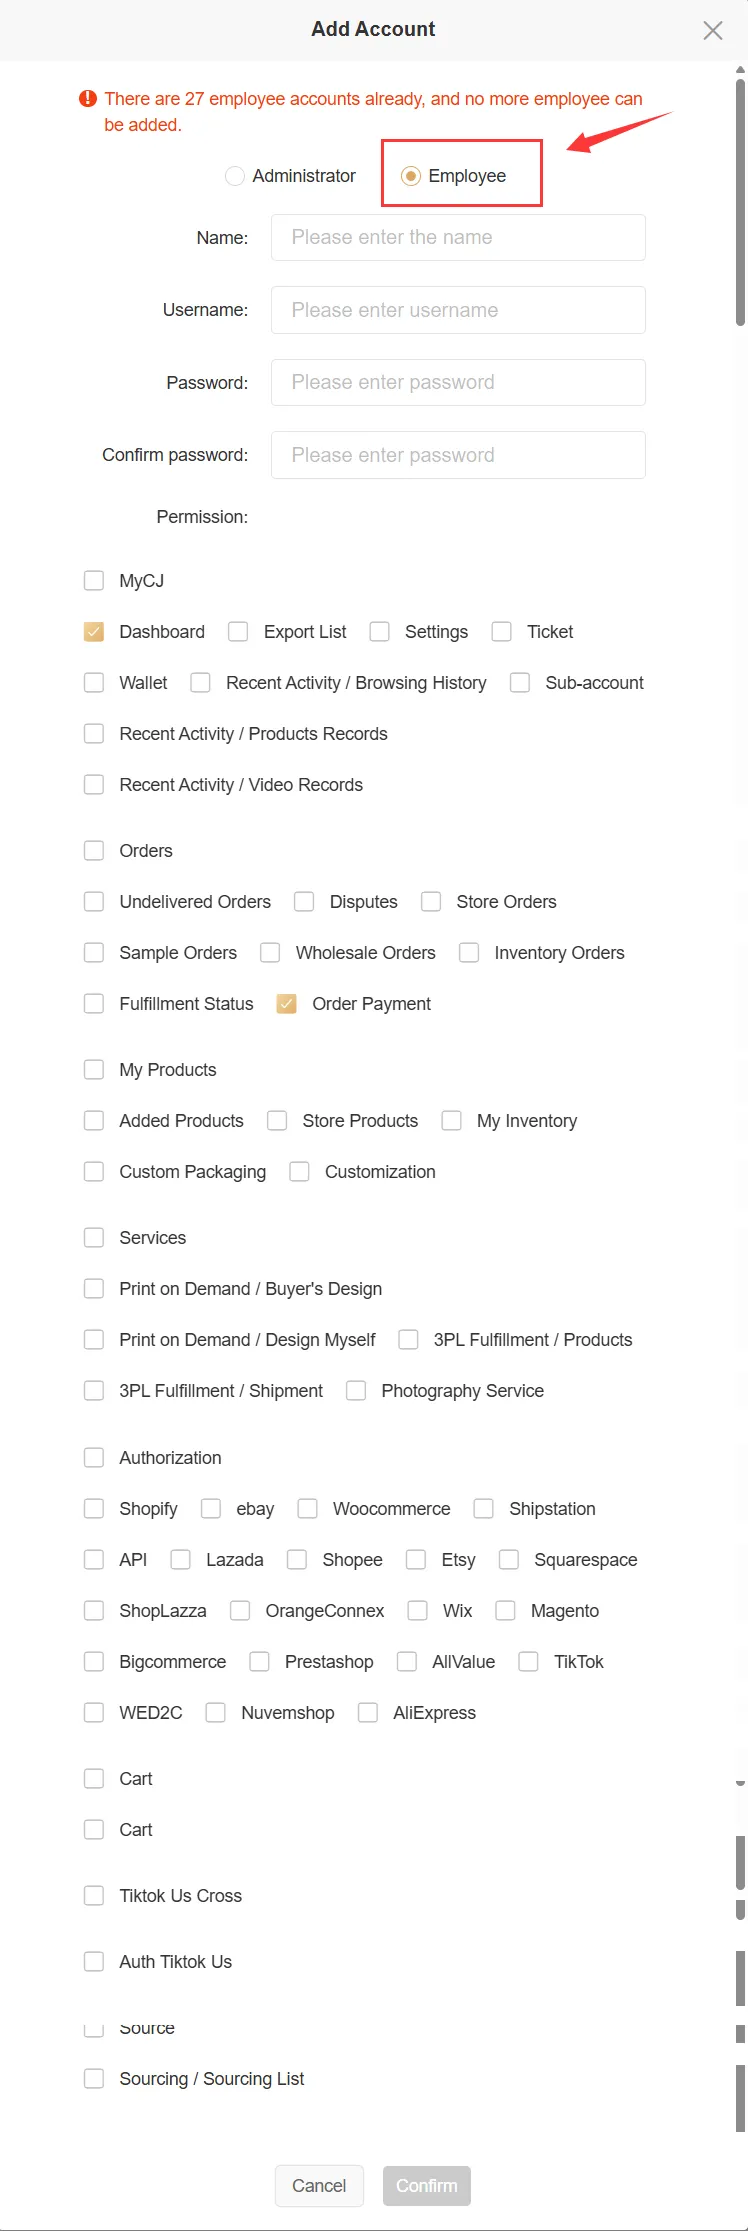
- Select Account Type and Assign Permissions
- View and manage sub-accounts
Step 1: Go to Sub-account Management
Go to: My CJ > Settings > Sub-account Management
Step 2: Click Add Account
Step 3: Select Account Type and Assign Permissions
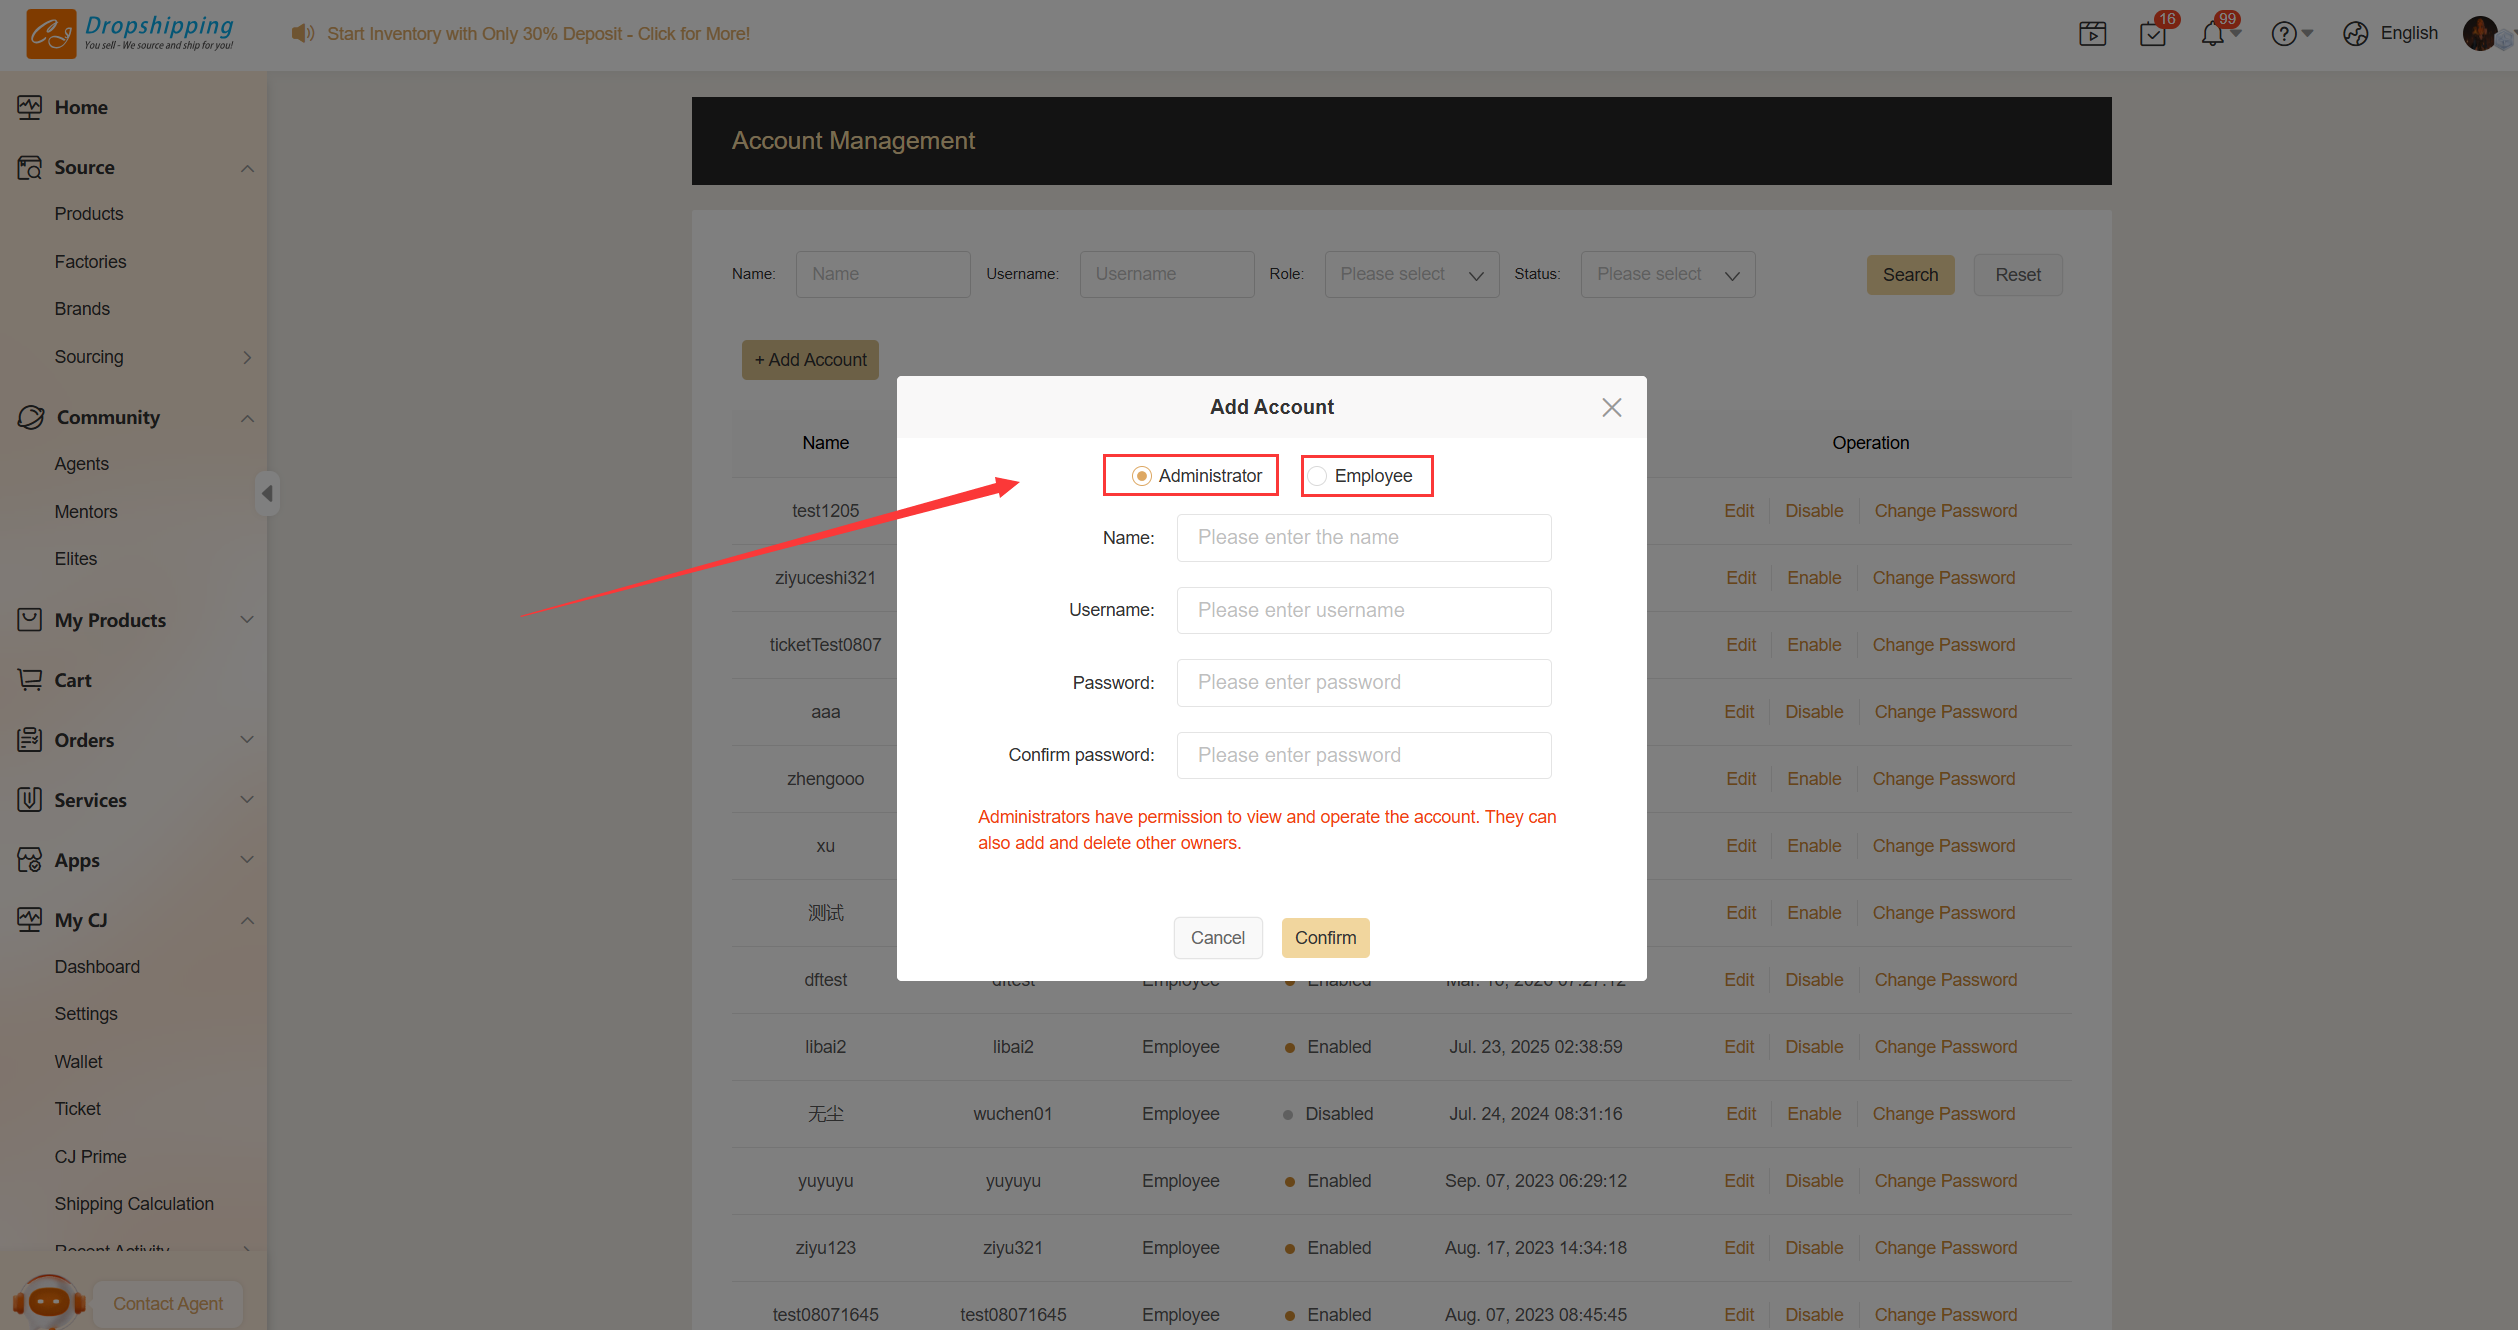
Choose an account type and set permissions.
There are two types of sub-accounts:
- Administrator:
Has full access to all features.
Note: You can add up to 3 Administrator accounts.
- Employee:
Has limited access based on the permissions you assign.
Step 4: View All Sub-accounts
On this page, you can view all sub-accounts under your main account.
You can search by:
- Name
- Username
- Role
- Account Status
If you have any questions, feel free to contact us anytime.
