${articleTitle}
How to Manage Shopify Delivery Profiles on CJ?
To successfully sell products on Shopify, each product must be linked to a Delivery Profile, which defines how shipping fees are calculated and charged to customers. Without a Delivery Profile, products may appear as unavailable or unsellable on your store.
Due to Shopify’s latest policy updates, CJ now supports centralized management of Delivery Profiles for Shopify stores. This helps simplify shipping configuration and reduces the risk of products becoming unavailable because a Delivery Profile was not properly linked.
This guide explains how to enable CJ-managed Delivery Profiles, how to configure shipping rates, and how to ensure your products are correctly associated during listing.
Overview: Why Delivery Profiles Matter
After a product is published to Shopify, the CJ-created location must be associated with a Delivery Profile.
A Delivery Profile can be understood as a shipping template that determines how much customers pay for shipping based on regions and rates.
Previously:
-
Delivery Profiles were created and managed directly in the Shopify admin
-
Sellers had to manually link CJ locations to the correct Delivery Profile
Now:
-
CJ can manage Delivery Profiles on your behalf
-
This provides a more consistent and error-free shipping setup, aligned with Shopify’s latest requirements
Step 1: Store Delivery Profile Master Switch
In the CJ system, you will find a Delivery Profile switch in the Shopify store list.
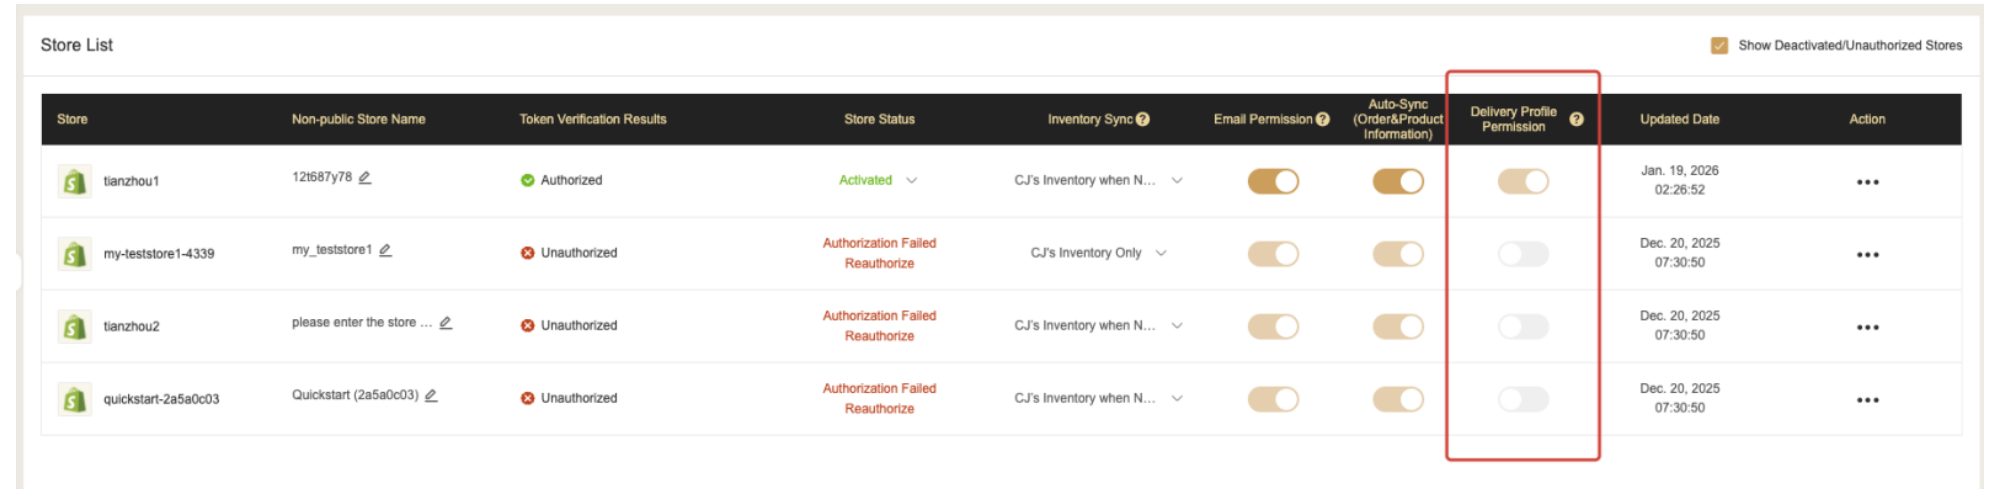
Switch Rules Explained
-
Stores created after Jan 19, 2026 (20:00 Beijing Time)
-
The switch is enabled by default
-
It cannot be turned off
-
Delivery Profiles must be managed by CJ
-
Tooltip message: According to Shopify's latest policy, newly authorized stores require the application to manage the Delivery Profile itself, and disabling it is not currently supported.
-
-
Stores created before Jan 19, 2026 (20:00 Beijing Time)
-
The switch can be enabled or disabled manually
-
If the Switch Cannot Be Enabled
If the switch is disabled and cannot be turned on:
-
You need to reauthorize your Shopify store
-
After reauthorization, CJ will gain permission to manage Delivery Profiles
Tooltip message: You need to reauthorize the store to enable this switch. Please reauthorize.
If the switch can be toggled freely, your store already has Delivery Profile management permission.
Step 2: Managing Delivery Profiles After Enabling the Switch
Once the master switch is enabled, CJ can maintain shipping configurations for your Shopify store.
Step 2.1: Access Delivery Profile Management
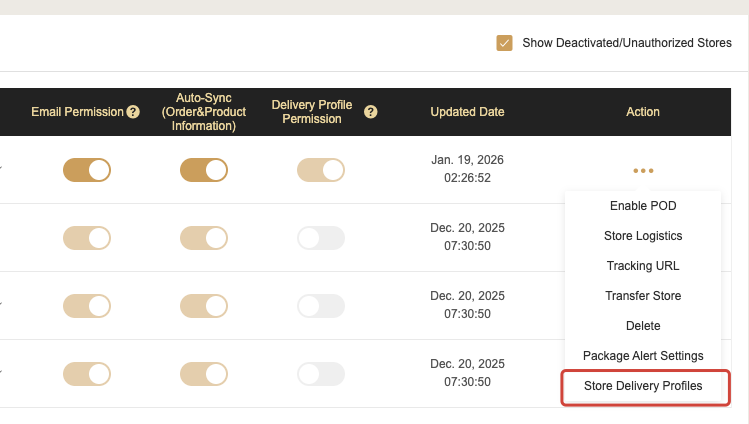
Go to:
Action → Store Delivery Profiles
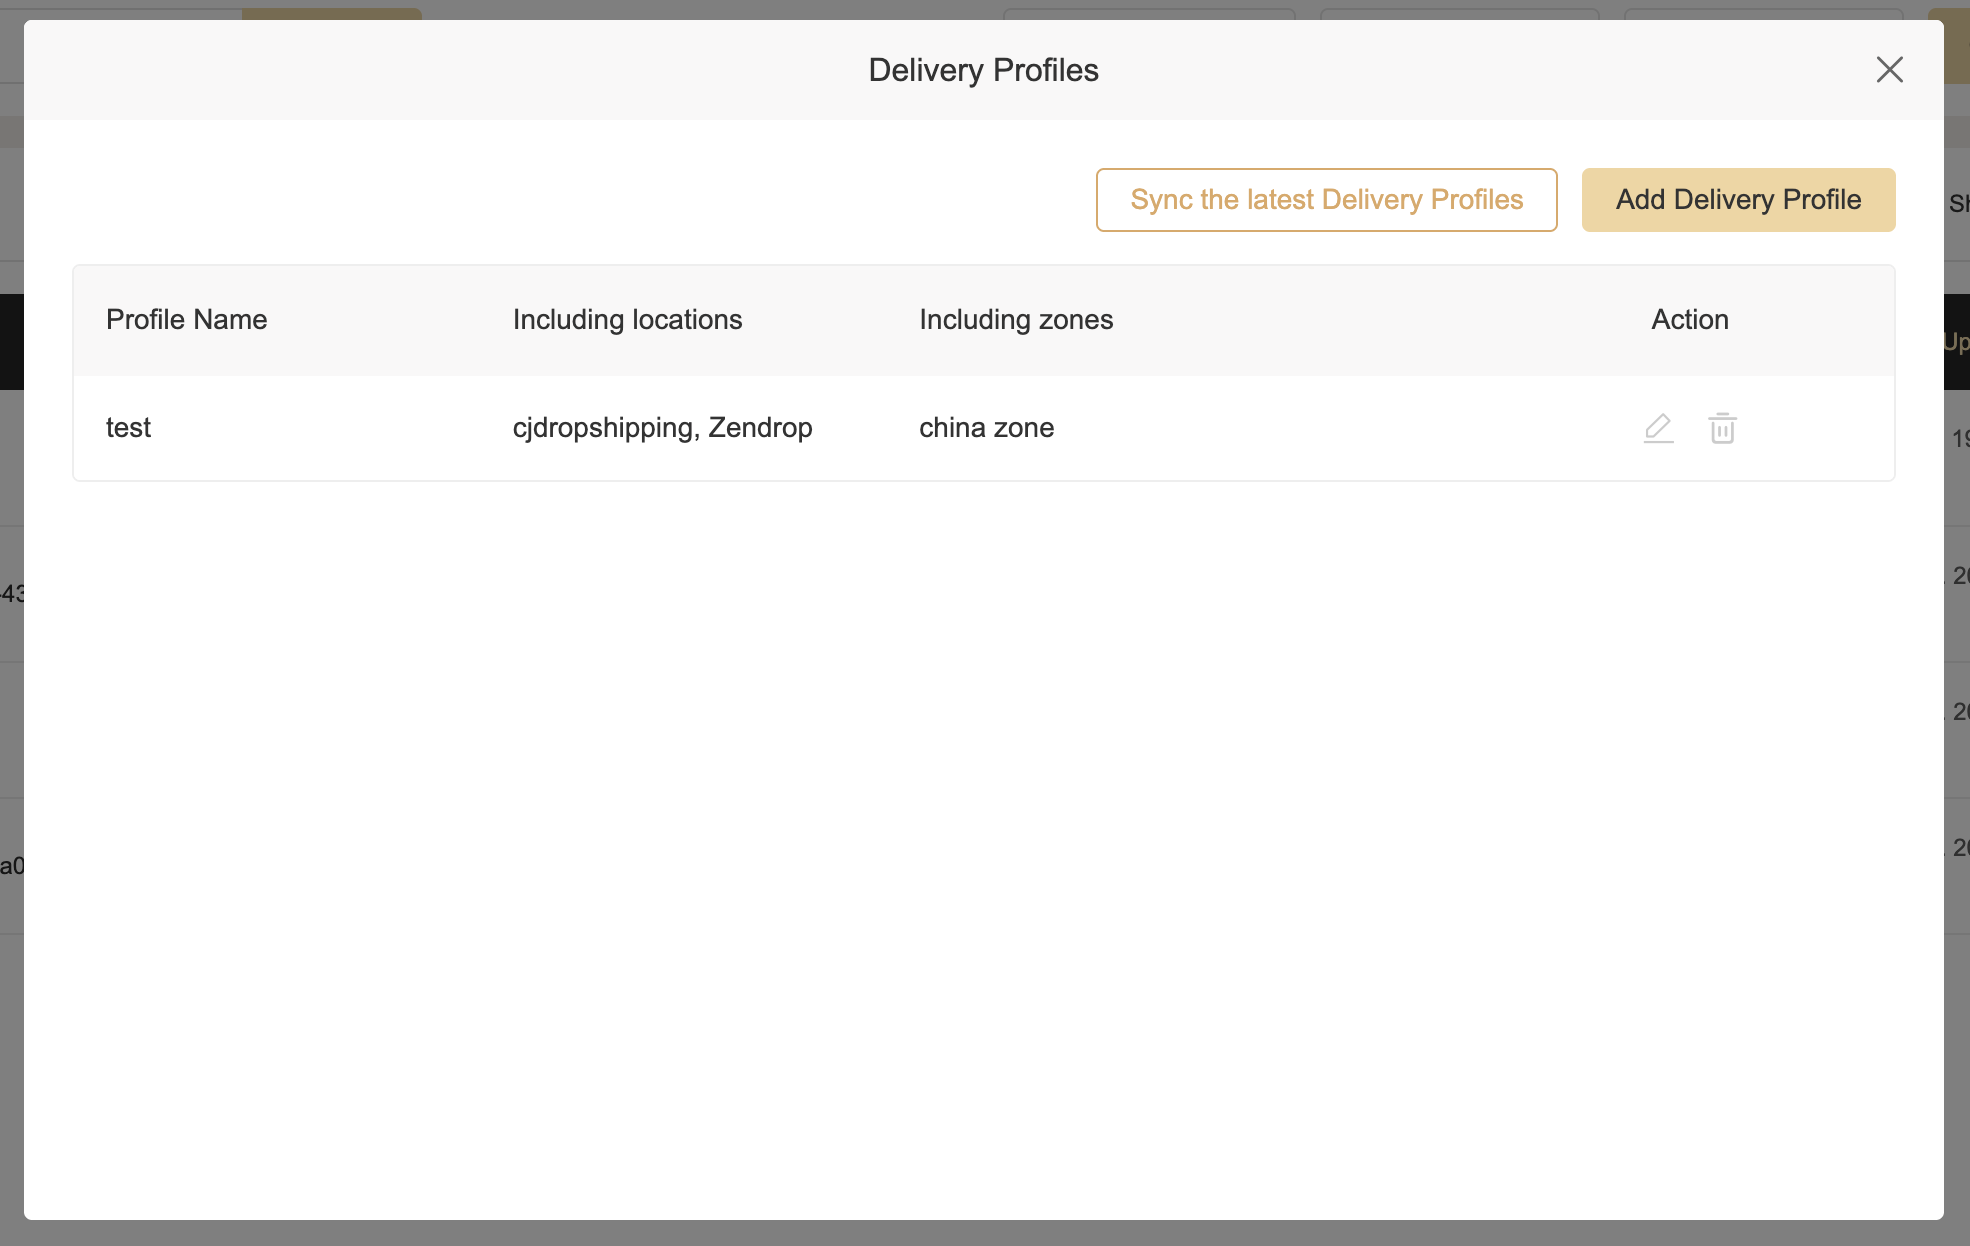
-
Click Sync the latest Delivery profiles to fetch the most recent data from Shopify
-
Delivery Profiles created directly in Shopify can be viewed but cannot be edited in CJ at this time
Step 2.2: Add a New Delivery Profile
Click Add Delivery Profile to create a new shipping configuration.
Scenario 1: No Delivery Profile Linked to a CJ Location
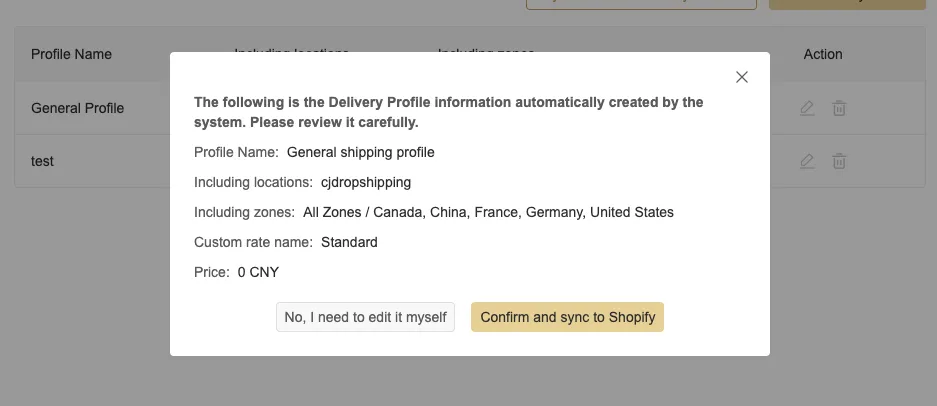
If the system detects that a CJ-created location is not linked to any Delivery Profile:
-
A dialog will appear asking whether you want CJ to automatically create a free-shipping Delivery Profile
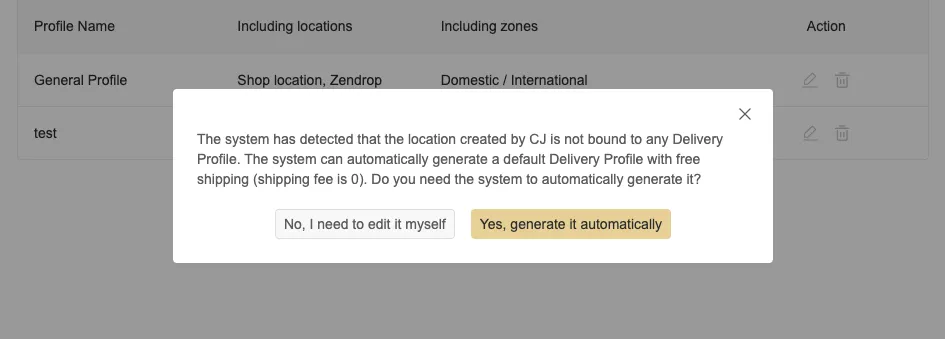
If you click YES:
-
CJ will generate a Delivery Profile for all store markets
-
Shipping price will be set to 0
-
You will be asked to confirm
-
After confirmation, the profile will be created and synced to Shopify automatically
Scenario 2: Manual Delivery Profile Setup
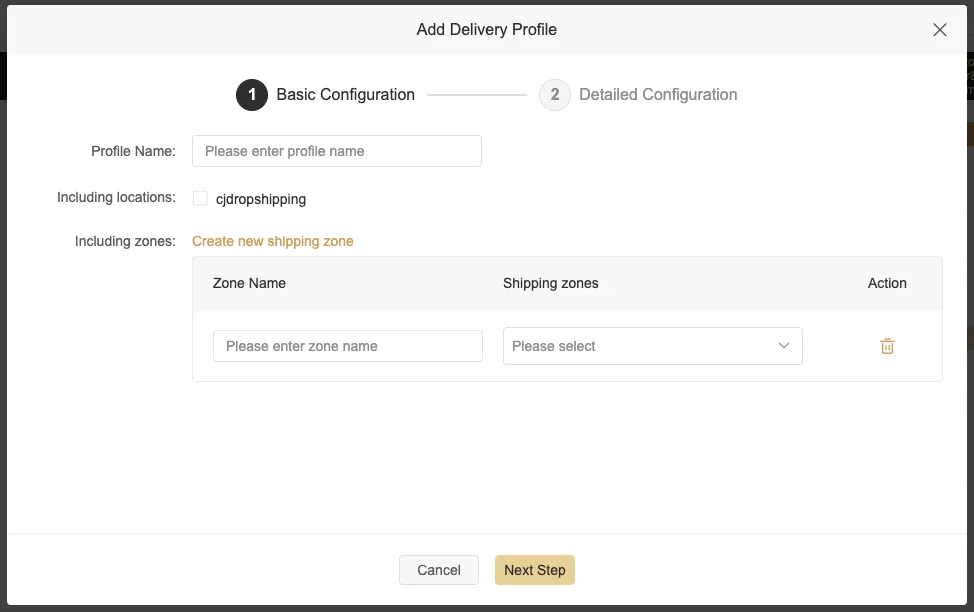
If you choose “No, I need to edit it myself”, you will enter the manual configuration page.
You can configure:
-
Profile Name
-
Included Locations
-
Must be CJ-created locations
-
One location can only belong to one Delivery Profile
-
-
Shipping Regions
-
Select from all countries available in your store’s markets
-
Regions can be grouped for easier management
-
Click Next Step to continue.
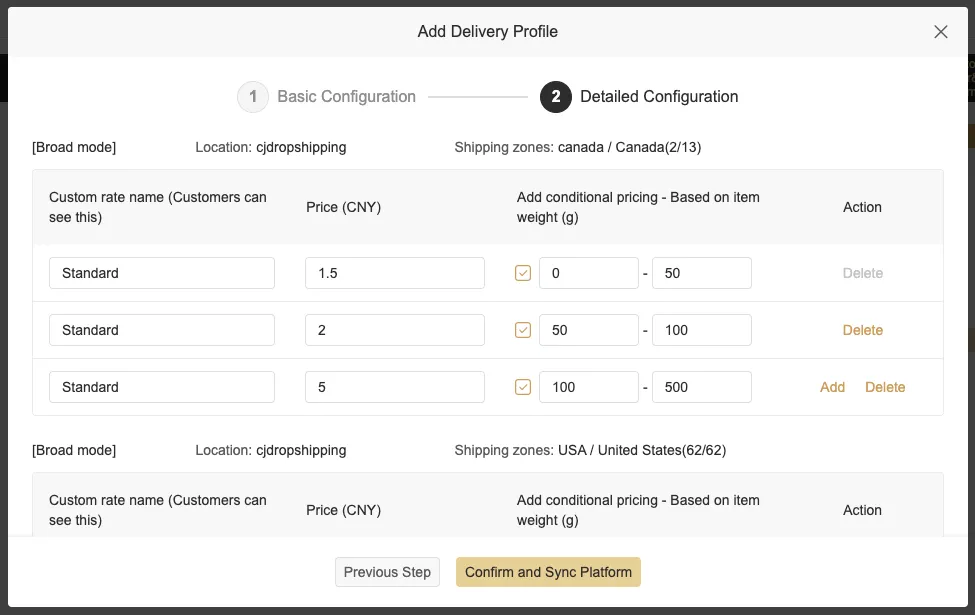
Step 2.3: Configure Shipping Rates
The system will prompt: This location only supports flat-rate shipping at the moment (precise rate calculation will be supported in the future). Do you want to continue?
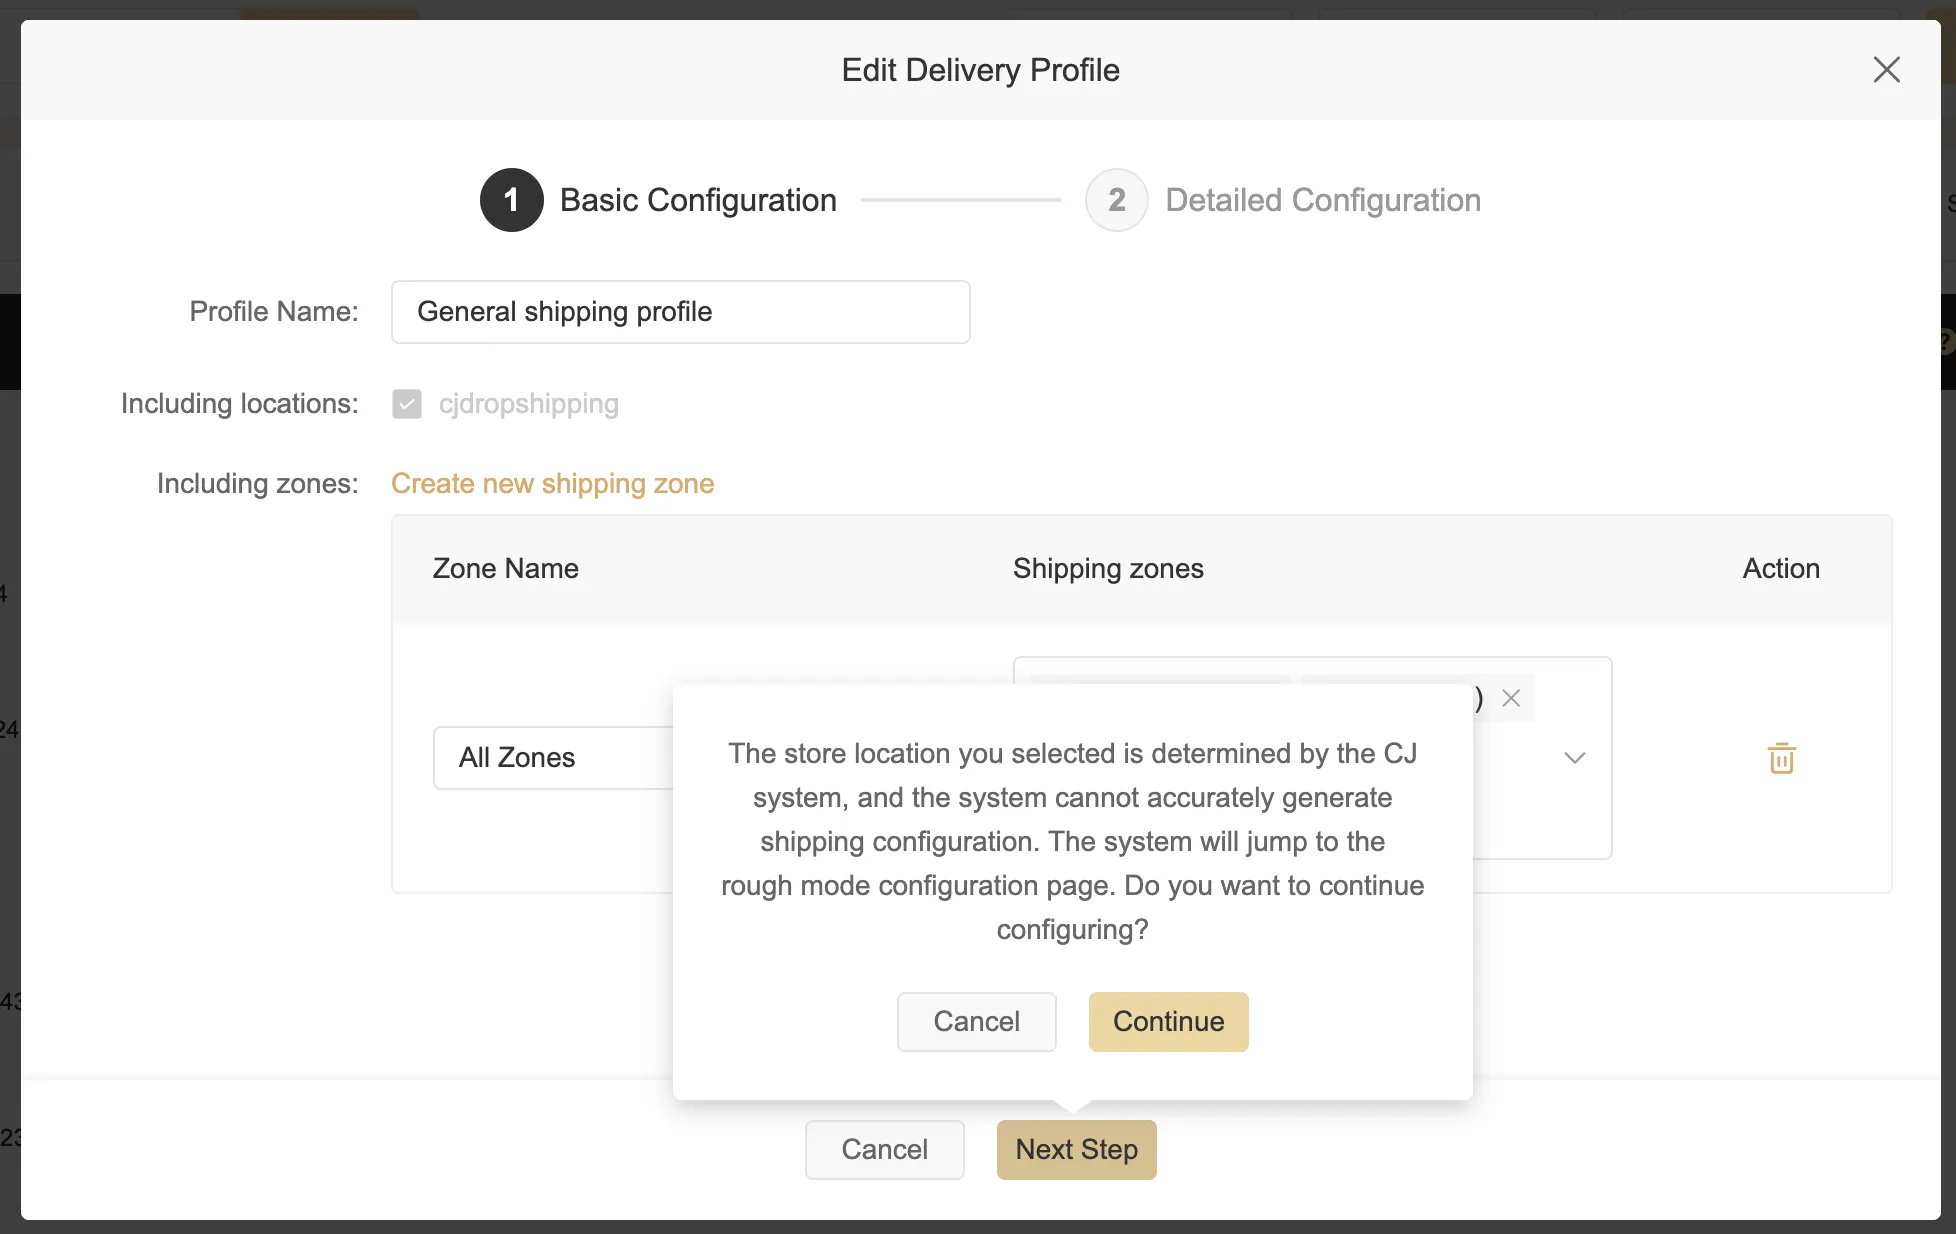
Click Continue to proceed.
On the configuration page:
-
Enter a Custom Rate Name (visible to customers)
-
Enter the Price
-
Optional: Add weight-based conditions
-
Weight unit: grams
-
Weight ranges must not overlap
-
If not enabled, the rate applies as a flat price
-
After completing all required fields, click Confirm and Sync Platform.
The Delivery Profile will be created and synced to your Shopify admin.
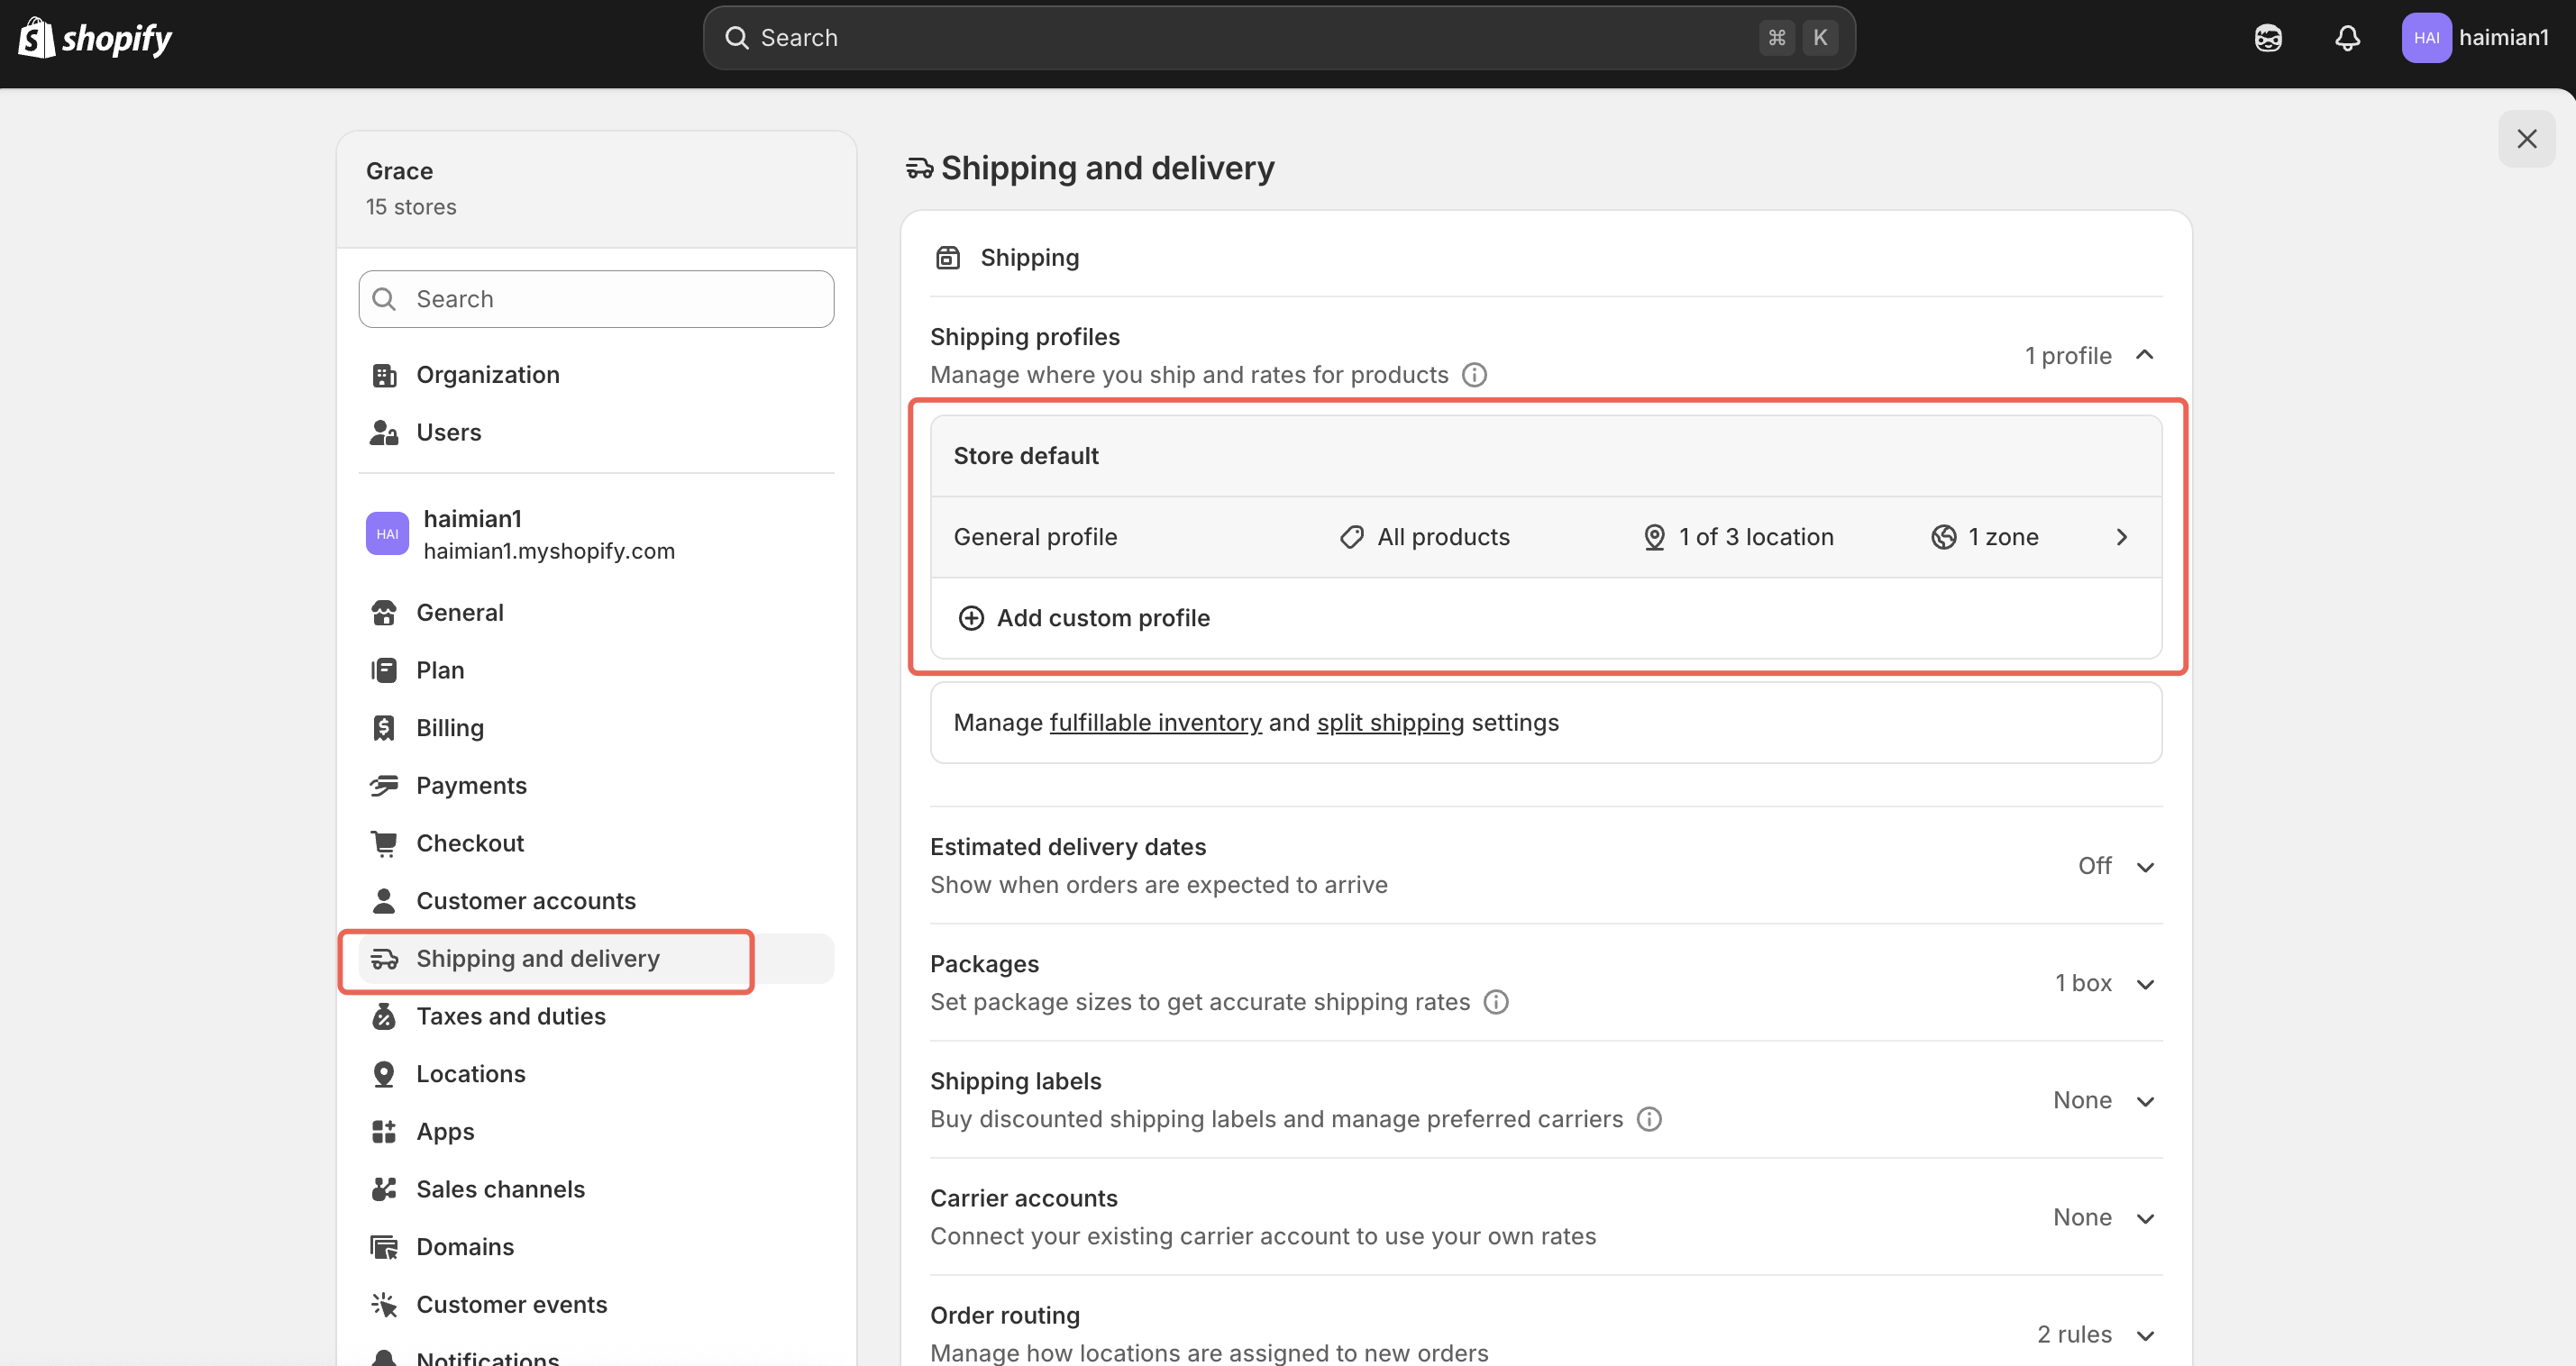
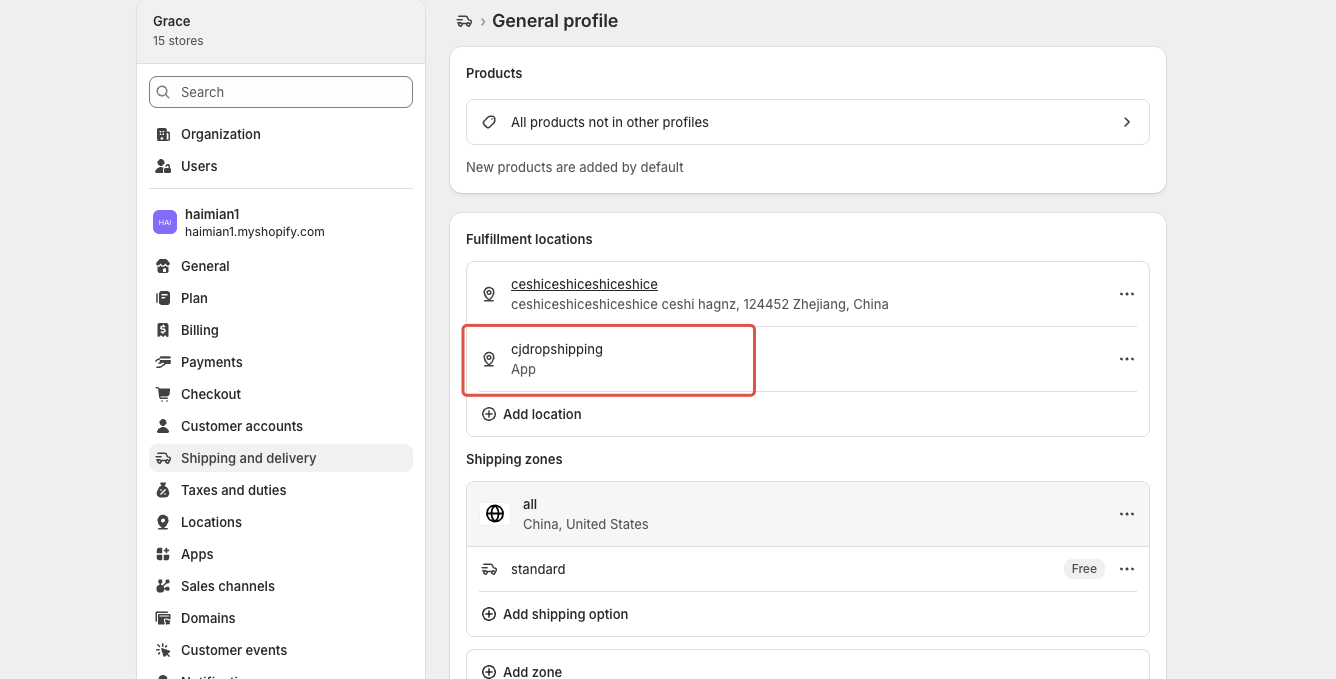
Step 3: View CJ-Managed Delivery Profiles in Shopify
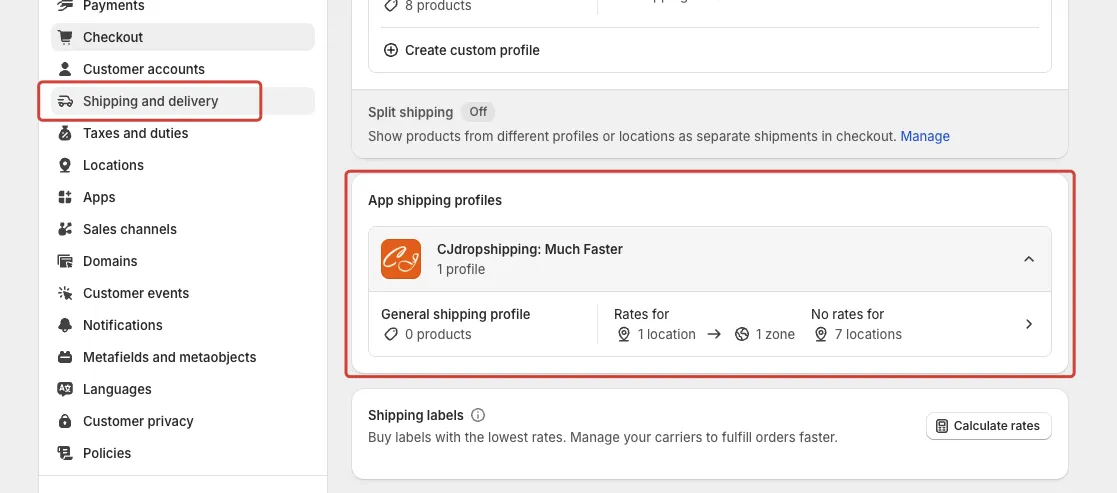
You can verify the profiles created by CJ directly in Shopify:
Shopify Admin → Settings → Shipping and delivery
Here, you will see the Delivery Profiles maintained by CJ.
Step 4: Linking Delivery Profiles When Listing Products
Once the switch is enabled, associating products with a Delivery Profile becomes mandatory during listing.
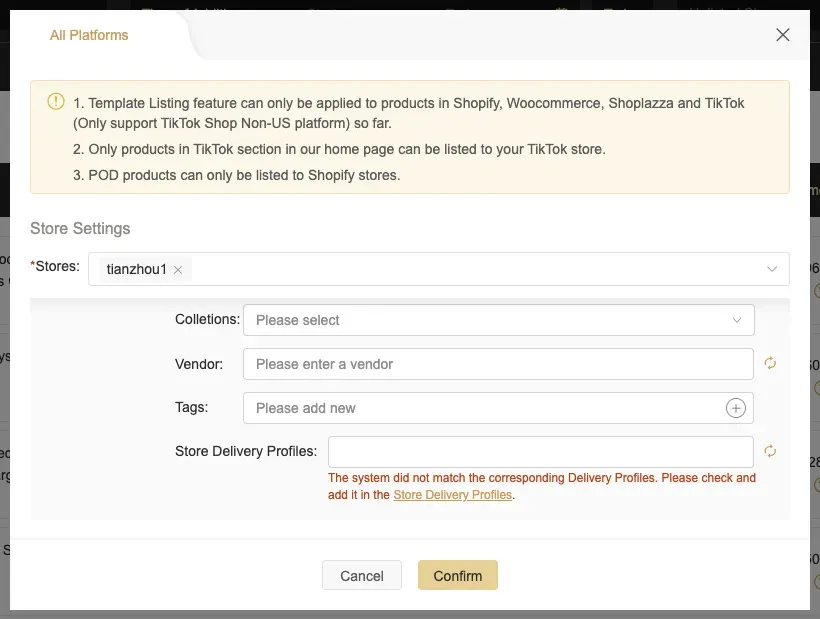
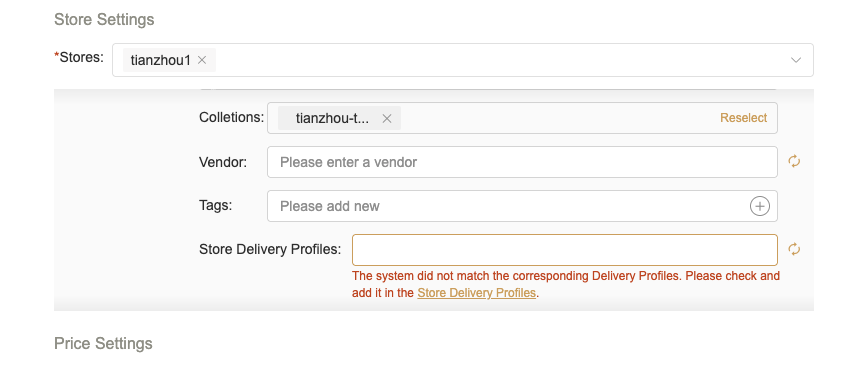
Single or Bulk Product Listing
-
A Delivery Profile dropdown will appear on the product listing page
-
If no Delivery Profile matches the CJ location:
-
The dropdown will be empty
-
A prompt will appear: No matching Delivery Profile found. Please add one in Store Delivery Profile Management.
-
-
If a matching profile exists, it will be selected by default
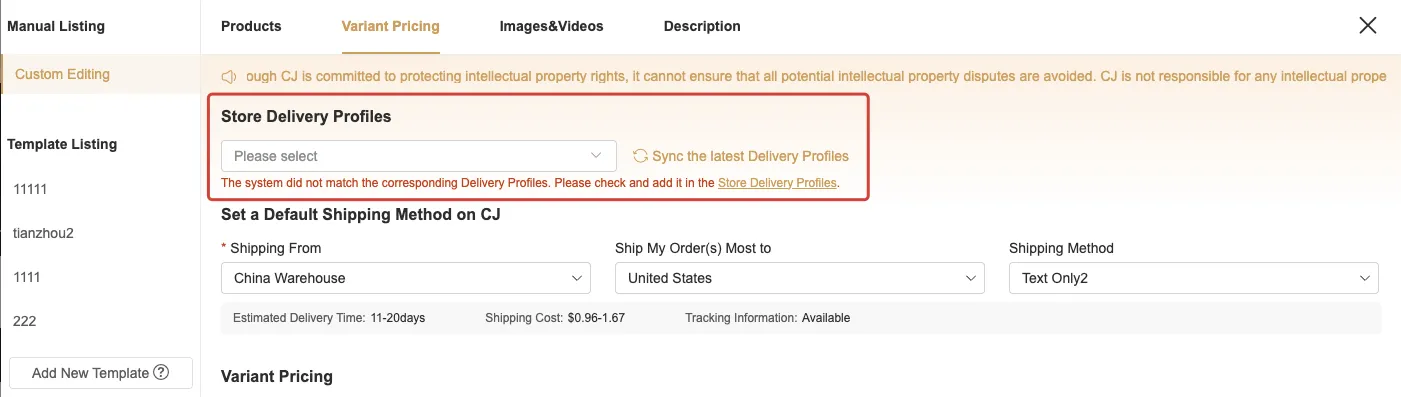
Template Listing

When using listing templates:
-
The system will check whether a Delivery Profile is bound to the template
-
If not, the listing will fail with the error: The template lacks the Delivery Profile. Please edit the template to add it and try again.
To fix this:
-
Edit the template
-
Bind a Delivery Profile
-
Retry the listing
*Linking Shopify Products to Delivery Profiles Containing CJ Location
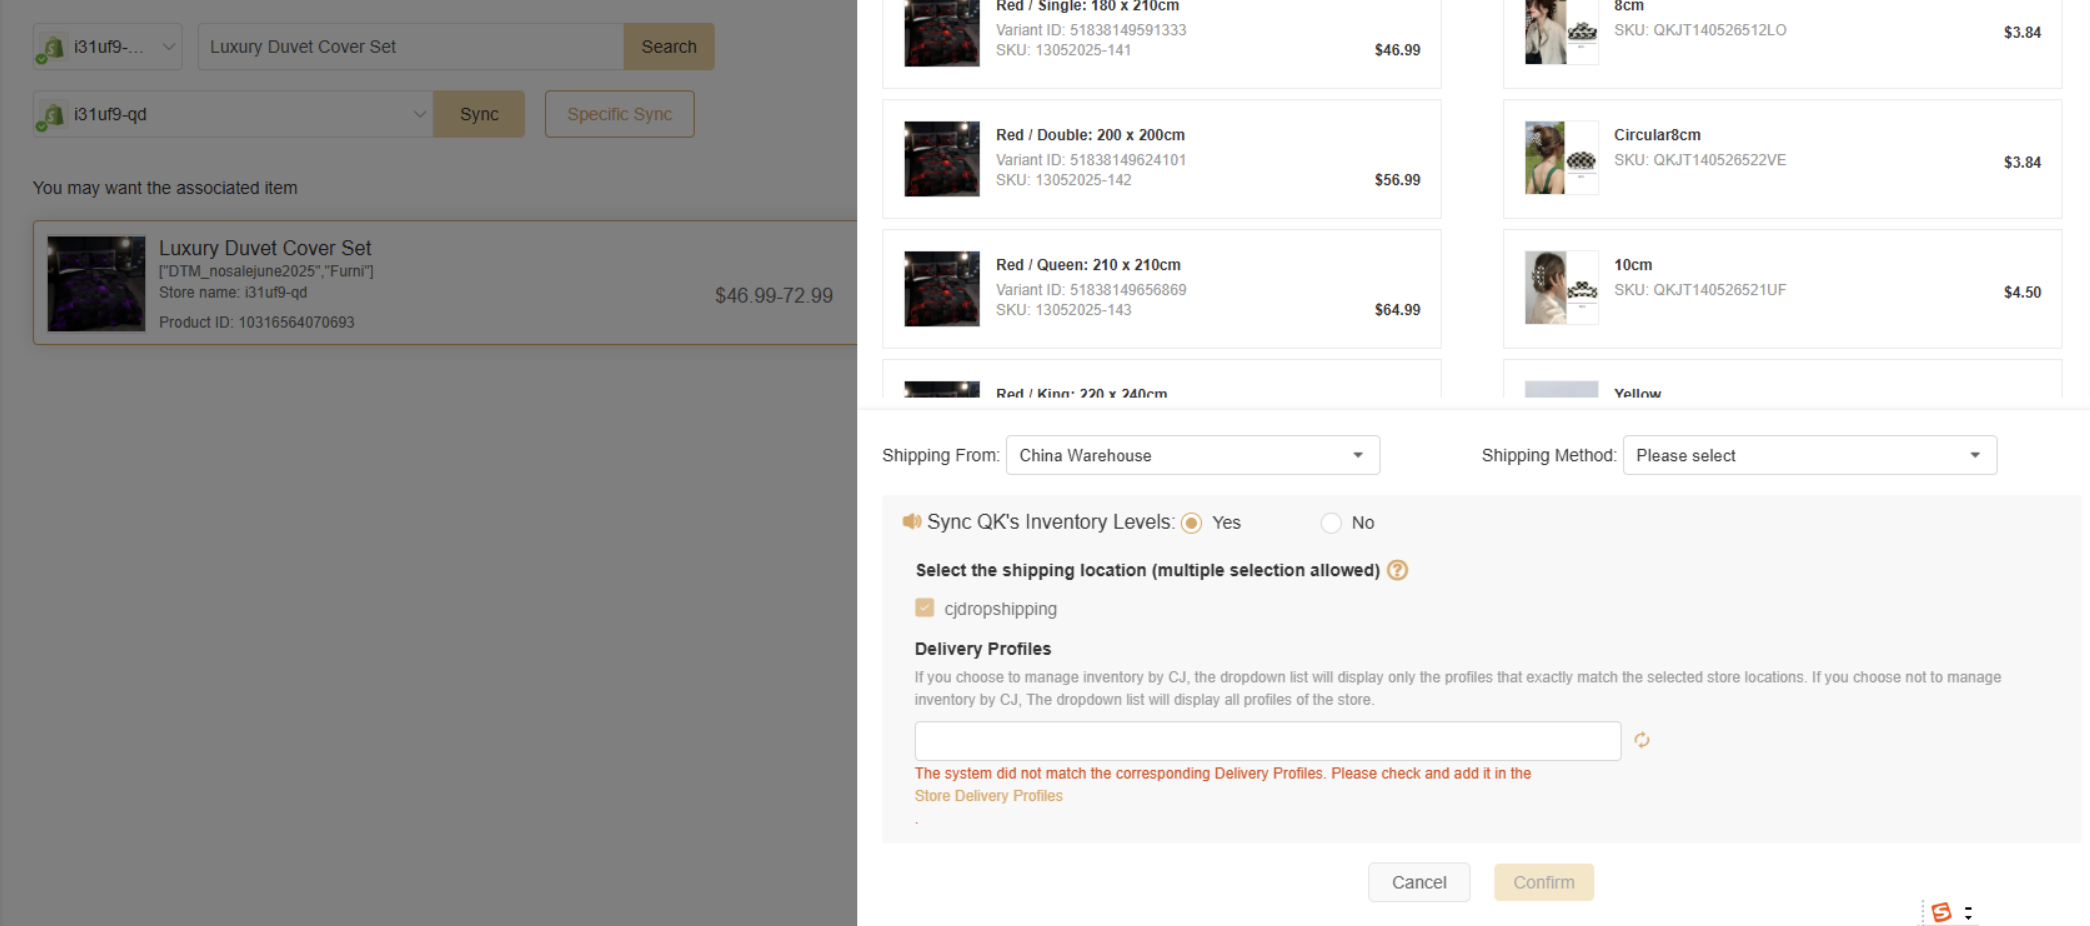
Once the switch is enabled, Shopify store products associated with CJ products must be linked to a Delivery Profile containing the CJ-created location.
Option 1: Add the CJ Location to an Existing Shopify Delivery Profile
- Applicable scenario: All store locations share a single delivery profile created in the Shopify backend.
- Steps:
1. Go to Shopify backend and open the existing delivery profile.
2. Click to add a location.
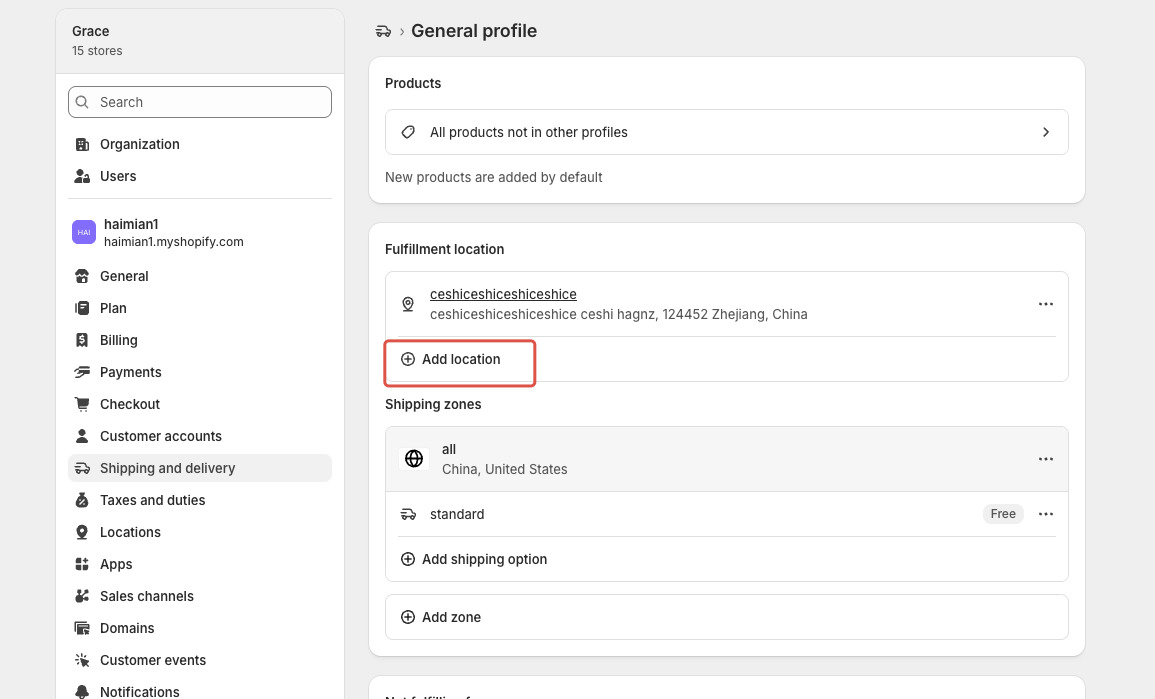
3. Select the CJ-created location and save the profile.
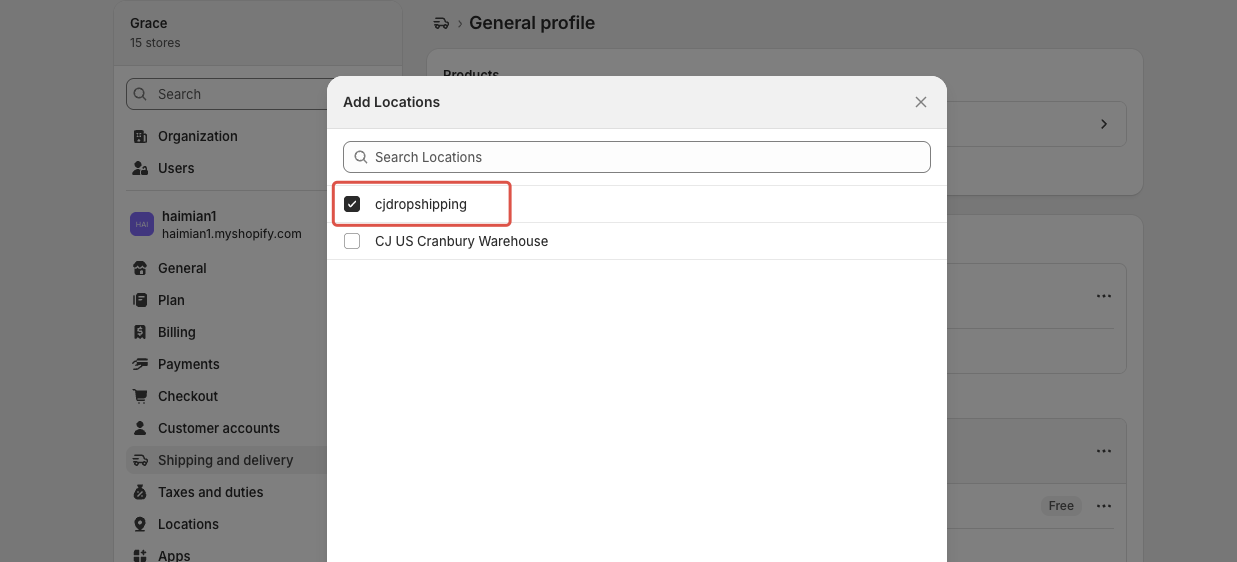
4. Return to the CJ product association page and click the update button on the profile dropdown.
The dropdown will now include the CJ location.
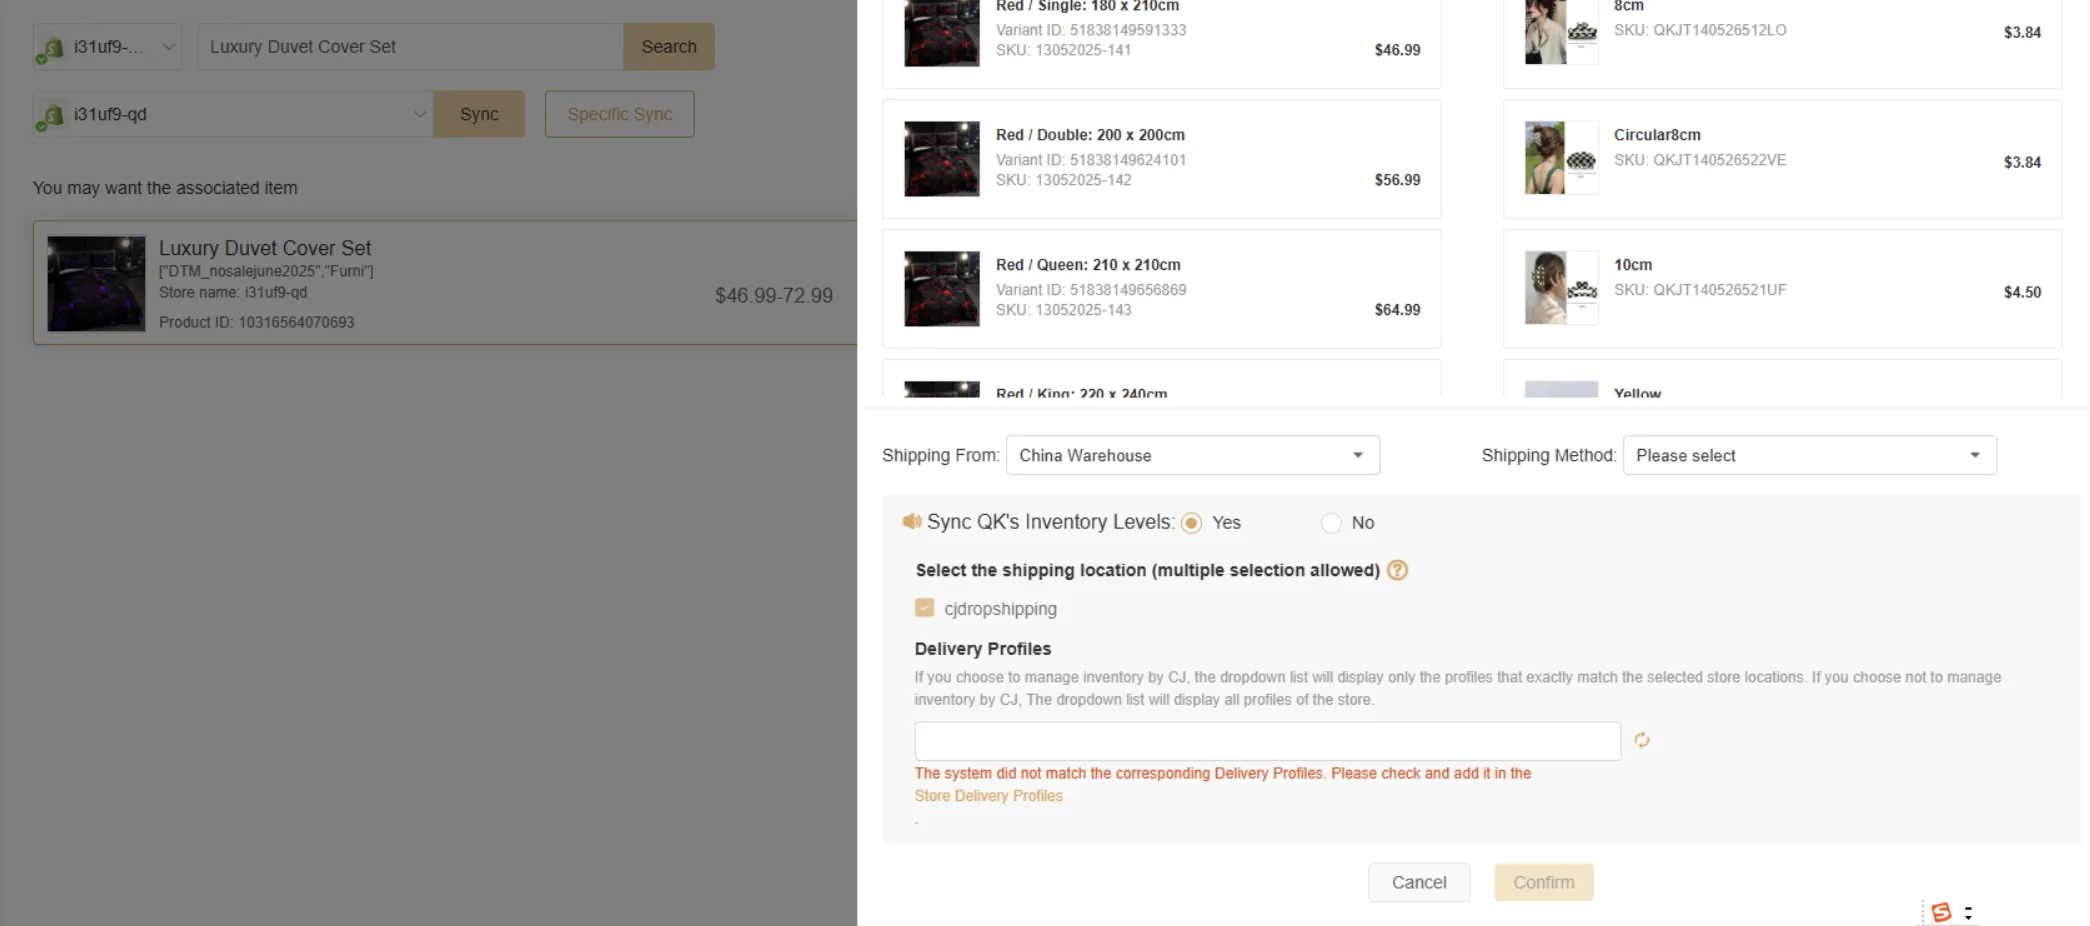
Option 2: Create a Delivery Profile in CJ Including the CJ Location
- Applicable scenario: The store has no delivery profile yet or you want a separate profile specifically for CJ.
- Steps:
- Follow the steps in section 2.2 of this guide to create a default delivery profile in CJ.
- Return to the CJ product association page and click the update button on the profile dropdown. The dropdown will now include the CJ location.
If you need any help during the process, don’t hesitate to reach out to CJ online support. We’re here to assist you at any time.
